1)
What is a cluster ?
Cluster is a
logical name assigned to group of servers (JVMs).
2)
In a clustered environment how can a request
passess to only one jVM?
Change the
cluster member weight to “0” in plugin-cfg.xml
3) What
are the different types of clusters?
Horizontal
and Vertical cluster
4) What is the advantage of Clustering?
Clustering is mainly to provide
Fail-over capability.. i e if one server is goes down automatically the other server
which is having the same configuration ie replica of failed server have to
serve the application request. This is achieved through the clustering..
In horizontally clustered environment,
cluster-enabled application is deployed on multiple physical machines. Each
machine is available for requests. Horizontal clusters offers protection over
hardware failure, increases efficiency, provides load balancing and process
failover. However, since there are many number of physical machines involved
the installation and maintenance cost increases proportionally. In vertical
clustering, multiple application server instances are hosted on the same
physical machine. This type of clustering provides increased efficiency, load
balancing and process failover. However, if hardware fails then there may not
be ready alternative.
5) What
is Horizontal and Vertical cluster?
A
vertical cluster has cluster members on the same node, or a physical machine. A
horizontal cluster has cluster members on multiple nodes across many machines
in a cell.
6) How do you verify that you are using
Horizontal clusters not a vertical cluster?
A) if u have all the servers in same
machine(Host) ,than its vertical ,if cluster servers are installed in different
machine than its horizontal.
-OR-
Go to WAS console => select Nodes in left
side => in the right side of the console you can see how many nodes make's
your CELL, and also the hostname of the boxes in which the node exists.
if you see all the nodes from different hostnames then its Horizontal clustering if you see same hostname here then its Vertical clustering
if you see all the nodes from different hostnames then its Horizontal clustering if you see same hostname here then its Vertical clustering
7) How
to assign weights to cluster members in WebSphere?
While creating the cluster members
we can assign waits...we can give different waits among each cluster...the
highest wait of a cluster member will serves more requests..the default wait
value is 2 and the range of wait is 0-20.
Click Servers > Clusters >
WebSphere application server clusters, and then click a cluster.
In the Additional Properties section, click Cluster members.
Change the configured weight of the cluster member that you created in Adding a cluster member to zero so that the cluster member no longer receives requests. Click Update.
In the Additional Properties section, click Cluster members.
Change the configured weight of the cluster member that you created in Adding a cluster member to zero so that the cluster member no longer receives requests. Click Update.
8)
VerboseGC?
VerboseGC is the logging
mechanism implemented by the JVM to diagnose memory/storage problems. Here
Garbage collection identifies and frees previously allocated storage that is no
longer in use.
9)
How do set it up VerboseGC In Admin Console ?
goto Servers >
Application Servers > Java and Process Management > Process Definition
> Java Virtual Machine > Check Verbose Garbage Colletion option.
10)
What
files have verbosegc information?
That particular server's
(<profile_home>/logs/servername/) native_stderr.log
11)
What tool did you use to analyse verbosegc
logs ?
GCAnalyzer
12) What
is Garbage Collection?
Garbage collection is a process of
automatically freeing objects that are no longer referenced by the program.
13) What
will happen if garbage collection is enabled?
When verbose garbage collection is
enabled, the Java™ virtual machine (JVM) records information about each garbage
collection in a log file. For example, in the log file, you can see the amount
of free bytes and used bytes in the heap, the interval between garbage
collections, and the pause time. Verbose garbage collection has minimal effect
on system performance.
14) Where would you enable Verbose Garbage
Collection?
From the Admin Console: Application Server -> ServerName ->
Process Definition -> Java Virtual Machine – Select verbose garbage
collection radio button.
15) What log file would the verbose garbage
collection output appear in?
native_stdout.log
16) Ho to check GC is active or not, if you don't
have?
We
can check in logs
17)
How do
you set up traces?
In Admin console
Troublshooting > logs and trace > servername > choose Diagnostic trace
18)
What is
the plugin configuration file and where is it located?
The plug-in configuration file
(plugin-cfg.xml) contains routing information for all applications mapped from
the web server to the application server.
19)
How do
u regenerate the plugin config file ?
The GenPluginCfg command is used to regenerate
the plug-in configuration file. Depending on the operating platform, the
command is: Linux and Unix: GenPluginCfg.sh Windows: GenPluginCfg.bat
20)
When do
you regenerate the plug-in config file?
The plug-in configuration
file needs to be regenerated and propagated to the Web servers when there are
changes to your WebSphere configuration that affect how requests are routed
from the Web server to the application server. These changes include:
·
Installing
an application
·
Creating
or changing a virtual host
·
Creating
a new server
·
Modifying
HTTP transport settings (i.e HTTP ports)
·
Creating
or altering a cluster
21)
When do
you manually edit the plug-in config file?
When enabling SSL (specifying the key file
name), LoadBalanceWeight, and minimum number of connections.
22)
What is the information in a plugin config
file?
Plugin config file contains routing
information along with information on virtual hosts , clusters (cluster
members), and URIs.
23) What are the use of PluginKey.kdb &
PluginKey.sth
?
PluginKey.kdb Holds the
Plugin Certificate and the Server Key to Enable the Web Server to trust the
WebSphere JVM.
PluginKey.sth Holds the Access password for the PluginKey.kdb
24) How the web server knows
plugin cfg.xml file is available in a particular location ?
We are mentioned in the httpd.conf file
25)
When
the request comes to a webserver how does the webserver know the JVM that is
capable of handling that request.
The
webserver first takes the request and if it can't serve, it forwards the
request to the plugin config file . The plugin config file routes the request
to the appropriate application server (or cluster member or jvm) according to
the mapping information it has.
26)
What is the refresh interval of plugin. ?
60
seconds
27)
If a change is made to the plugin config
should the webserver be restarted?
Not required because the plugin's automatic
refresh interval is 60 seconds.
28)
If
changes are made to the config file should the webserver be restarted?
Yes. The webserver must to restarted so the
changes made to the config file become effective
29)
What is Deployment descriptor?
Deployment
descriptor is an XML file that describes how to deploy a module or application
by specifying configuration and container options. For example, an EJB
deployment descriptor passes information to an EJB container about how to
manage and control an enterprise bean.
30) What are
deployment steps?
Step 0: click on install button and browse the
ear/war file
Step 1: Select installation
options
Step 2: Map modules to
servers
Step 3: Map virtual
hosts for Web modules
Step 4: Map context
roots for Web modules
31)
When an
application is deployed, where can the application binaries be found ?
We can see Application binaries unser
profile_root/installedApps/cell_name/ directory
32)
What is
the difference between EAR, JAR and WAR file?
: In J2EE application modules are packaged as
EAR, JAR and WAR based on their functionality JAR:
ü
EJB
modules which contains enterprise java beans class files and EJB deployment
descriptor are packed as JAR files with .jar extension
ü
WAR Web
modules which contains Servlet class files,JSP FIles,supporting files, GIF and
HTML files are packaged as JAR file with .war( web achive) extension
ü
EAR All
above files(.jar and .war) are packaged as JAR file with .ear ( enterprise
archive) extension and deployed into Application Server.
33)
In a cluster of 4
members deploying an application it is showing partial start after starting the
application what might be the problem?
Synchronization is one of the problems for the
partial start, we do it both from console and command line synchronization.
Bin> ./syncNode.sh dgmr host 8879 (soap
port)
34)
How do you know all
the running java process?
Ps-ef|grep java
35)
Installation was
successful and when I am trying to start server it is giving “Invocation Target
Exception” why you will get this issue and how you are trouble shooting this
issue.
May be the problem
with hostnames, hostnames are mismatched. Add the host name in etc/hosts file
which you had given at the time of installation.
36) How
to install an application in one cluster member out of multiple members?
One
cannot deploy application in one cluster member alone in the clustered
environment since application which is deployed in one cluster member will be
shared across to the other cluster members automatically. So logically it is
equivalent, installing application in cluster level
37)
What is
the difference in installation of war and ear?
Only difference in this application
installation is optional context root for JAR and EAR and for WAR it is
mandatory. If EAR file is having multiple modules like JAR, WAR then we can
target these files to different application servers.
38)
What is
context root?
The context root identifies the web
application. By context root only your configuration file (Plugin-cnf.xml)
route the request to the particular application.
39)
How
many ways one can deploy applications in WebSphere?
There are 3 ways to deploy an application in
WebSphere environment.
Ø
Directly
copy files to deployed application folder in WebSphere-hot deployment.
Ø
Use Web
Sphere specific ant tasks and building automated scripts for deploying
application.
Ø
Through
administration console.
40)
If
application is giving very slow response then how will improve?
Ø
Check
Connection pooling settings, change accordingly if required
Ø
Check
JVM memory settings, change accordingly if required
Ø
Check
the data base if its giving slow response Check any connection are waiting and
not closing
Ø
Check
the CPU utilization and JVM utilization
41) How to hit application without
hitting the web server?
Using webcontainer port on application
server
42) Application installed but not working. What are
troubleshooting steps?
ü Check the server is up or not
ü Check the application is up or not.
ü Check whether modules are mapped
properly to the servers
ü Check whether virtual hosts are
mapped properly for Web modules
ü Check whether context roots is
mapped properly for Web modules
ü Check whether you are hitting the correct url
ü Check the logs for any issues
43) We
have different types of logs in WAS?
JVM
logs: SystemOut.log, SystemErr.log
Process
or Native logs : native_stdout.log, native_stderr.log
IBM
service log : activity.log
Diagnostic
log : trace.log
We
have 12 different types of log levels. those are
1.off
2.fatal
3.severe
4.warning
5.Audit
6.Info
7.config
8.Detail
9.fine
10.finer
11.finest
12. All
2.fatal
3.severe
4.warning
5.Audit
6.Info
7.config
8.Detail
9.fine
10.finer
11.finest
12. All
45) What
is Pass By Reference in WAS and how we enable it?
The
pass by reference option available at ApplicationServers --> Server1 -->
Container Services --> ORB Services --> Pass by reference. It is related
to Call By Reference as in JAVA, here it may gather reference of RMI/CORBA
API(Application Programming Interface), used this for the reference
communication.
46) SLA’s
in your company?
Sev1=15mins
Sev2=30mins
Sev3=60mins
47) What
is the use of shared libraries? How to configure them?
Shared
libraries are files used by multiple applications. Each shared library consists
of a symbolic name, a Java class path, and a native path for loading Java
Native Interface (JNI) libraries. You can use shared libraries to reduce the
number of duplicate library files on your system.
48) In
which file hostname is available in UNIX ?
/etc/hosts
49) If
an administrator, after installing websphere/weblogic gui and working on it for
a while has completely forgotten his password and would like to log in to the
admin console only using his user id. Please explain how to go about it and
what & where should the changes be done?
He
can go to security.xml file and disable the security. He can save the file and
log in to admin console without user ID and password
In
this scenario, we can user 2 methods.
1.
In cell level security.xml file change the 2nd line and "enable=true"
change the trueparameter as "enabled=false" the restart your Dmgr and
login. It will no ask for password.
2.
Through WSadmin , we are having an option SECURITY OFF
50)
What is
the Default heap size for WAS ?
The default initial heap size for WAS is 50MB
and default maximum size is 256MB
51)
How do
you take back ups in WAS & What is the out put file?
backupConfig.sh [filename] -nostop
WebSphereConfig_yyyy-mm-dd.zip
52)
How do
you restore backups?
restoreConfig.sh <filename.zip>
-nostop
53) What
is the Default SOAP port number?
8879
54) How
will you verify the version of was in websphere?
1.
Executing ./versioninfo.sh script
2.
Viewing cat /opt/WebSphere/AppServer/properties/com/ibm/websphere/product.xml
config file
53) What does CPU Starvation mean? How you
will resolve?
CPU Starvation means that the JVM
had to wait for processing time! Some other process took 100% of the CPU and
the JVM did not work.
Check the application on the server
that is taking all the CPU time by using top command, investigate and stop the
process.
55)
How you
will check CPU utilization?
TOPAS
56) What are the
differences between server.xml & serverindex.xml?
Serever.xml file contains all the
information about the server configurations. Serverindex.xml contains all the
servers’ ports information.
Some of the examples of server
configurations would be:
1. Container Settings: Session
management, SIP Container Settings, Web Container Settings, Portlet Container Settings
2. Java and Process
Management: Class loader, Process definition, Process execution
57)
What is the use of soap.client.props& sas.client.props
properties files in web sphere?
If the global security is enabled WebSphere Application
Server cell, you need to manually enter the username and password every time
you run the wsadmin tool. By editing the sas.client.props and the
soap.client.props files, you can specify the username and password you have
configured for global security so you are not prompted to enter the username
and password every time you run administrative scripts.
58) What is difference between soap.client.props and sas.client.props?
The soap.client.properties are how
the Node Agents, Dmgrs, Job Managers, App Servers talk with each other over the
SOAP port defined.
The sas.client.properties are how SSL Client Authentication is completed
The sas.client.properties are how SSL Client Authentication is completed
59) What is the
difference between connection Poll and Data Source?
Connection pooling is
a place where a set of connections are kept and are used by the different
programmers without creating connections to the database.
DataSource
is an interface in javax.sql package.
An
XA transaction, in the most general terms, is a “global transaction”
that may span multiple
resources. A non-XA transaction
always involves just one
resource.
An
XA transaction involves a coordinating transaction manager, with one or more
databases (or other resources, like JMS) all involved in a single global
transaction. Non-XA transactions have no transaction coordinator, and a single
resource is doing all its transaction work itself (this is sometimes called
local transactions).
XA
transactions come from the X/Open group specification on distributed, global
transactions. JTA includes the X/Open XA spec, in modified form.
Most
stuff in the world is non-XA – a Servlet or EJB or plain old JDBC in a Java
application talking to a single database. XA gets involved when you want to work
with multiple resources – 2 or more databases, a database and a JMS connection,
all of those plus maybe a JCA resource – all in a single transaction. In this
scenario, you’ll have an app server like Websphere or Weblogic or JBoss acting
as the Transaction Manager, and your various resources (Oracle, Sybase, IBM MQ
JMS, SAP, whatever) acting as transaction resources. Your code can then
update/delete/publish/whatever across the many resources. When you say
“commit”, the results are commited across all of the resources. When you say
“rollback”, _everything_ is rolled back across all resources.
The
Transaction Manager coordinates all of this through a protocol called Two Phase
Commit (2PC). This protocol also has to be supported by the individual
resources.
In terms of
datasources, an XA datasource is a data source that can participate in an XA
global transaction. A non-XA datasource generally can’t participate in a global
transaction (sort of – some people implement what’s called a “last participant”
optimization that can let you do this for exactly one non-XA item).
61)
What is
the first signal you find when memory leakage is there in the application?
If you have memory leakage in your
application code then you get frequently “ OUT OF MEMORY EXCEPTION” error.
62)
How you
will find how much heap is used by each JVM?
Using PMI we can see the
percentage of the memory used by JVM
63)
Session
timeout ?
Specifies how long a session can go unused before it is no longer valid.
64)
During
WAS ND installation, one default server "server1" creates right?can
we change its name
During installation?
If we are installing, in silent we can change the default server name we can change, in GUI its not possible.
If we are installing, in silent we can change the default server name we can change, in GUI its not possible.
65) How do you find memory leaks? At what
situation memory leaks occur –Give any 3
examples? Is there any tool to find memory
leaks?
Memory leaks in hapen if objects not closing in java program.
Memory leaks in hapen if objects not closing in java program.
66)
Write the complete
command to create an App.Serv profile through command line.
C:\IBM\WebSphere\AppServer\bin>manageprofile.sh -create -profileName AppSrv04 - profilePath“C:\IBM\WebSphere\AppServer\profiles\AppSrv04″ -template
Path“C:\IBM\WebSphere\AppServer\profileTemplates\default” -nodeName app_node04 -cellNamecell04 -hostName krishamurthy
WAS V7 profile templates
cell
Default
Managed
dmgr
management
secureproxy
cell
Default
Managed
dmgr
management
secureproxy
68)
If you get a problem before creating a log’s
directory at the time of installation, at that time where you can check the
status of installation
tmp/log.txt
69)
Write a complete command to delete a profile.
C:\IBM\WebSphere\AppServer\profiles\AppSrv01\bin>manageProfile.sh
-delete -profileName AppSrv01
70)
How to know how many
profiles are available.
/AppServer/bin>./manageProfile.sh
–listProfiles
71)
What is
the defualt key store location for WAS?
<profile_home>/etc
72)
How do
you change the port number for admin console ?
We can change the ports in console or
serverindex.xml file
To
change a port value in the console:
a.
Start the WebSphere
Application Server administrative console.
b.
For WebSphere
Application Server, Version 7.0, click Servers > Server Types > WebSphere
application servers.
For
WebSphere Application Server, Version 6.1, click Servers > Application
servers.
c.
Select the server for
the port that you want to change.
d.
Click Ports.
e.
Change the value of the
port that you want to change.
73)
How do
you disable security for Deployment manager without logging into the console?
Go
to <wsas profile root>/config/cells/cellname/security.xml
In the security.xml , change enable=false .
74)
What
are the two virtual hosts that come with WAS installation?
admin_host, default_host
75)
If you
have to change the ports of a jvm manually without logging into the admin
console which file would you edit. ?
serverindex.xml
76) What
version of Web sphere software is required to install Web Sphere clustering?
Web
Sphere Application Server Network Deployment is the software required to
install a Web Sphere cluster.
77)
What is
the recommended free disk space in /tmp to install WAS.
1 GB
78)
What is the default installation location of
WAS in Linux.?
Opt/IBM/WebSphere/AppServer
79)
What is the default installation location of
WAS in Sun Solaris. ?
Opt/IBM/WebSphere/AppServer
80)
What is the default installation location of
WAS in AIX?
Usr/IBM/WebSphere/AppServer
81)
Which
registry file will get updated after installation of WAS?
vpd.properties
82)
What is the use of SOAP Connector port and
what is the default soap port number for DMGR profile.
Client Applications like wsadmin uses Simple
Object Access Protocol and that is listening to the port 8879. If we want
federate a profile by using SOAP protocol and SOAP connector port number, we
can federate a profile.
83)
What is
the default Http transport port number for Application Server profile and what
is the use. ?
9080, (if ssl was enabled
9443) If we want to invoke applications running on AppServer we are using HTTP
transport port
84)
What is
the difference between managed node and unmanaged node in ibm websphere ?
Manged Node contains node agent, we can
administer federated profiles servers and applications from dmgr admin console.
For unmanaged the will be no nodeagent
85)
What is
the port number for LDAP server with SSL and without SSL?
389
and 636
86)
What is
a connection pool?
Connection pooling is a place where a set of
connections are kept and are used by the different programmers without creating
connections to the database(it means there is a readymade connection available
for the programmers where he can use).
87)
What is
meant by Federation?
Federation
means add a node to the Deployment manager profile, by default nodeagent will
be created. The command is: /bin>addnode.bat -includeapps Example:(windows)
/bin>addnode.bat localhost 8879 -includeapps Example:(Linux)
/bin>addnode.sh localhost 8879 -includeapps
88)
Can you
federate a profile using manageprofiles command facility?
No, you can’t but you can delete a profile by
manageprofiles command facility
89)
How
many ways we can federate the Node?
Before federating any Node we must make sure
Application server should be started on the Node to be added and we need to
find the SOAP connector for DMGR
We can federate the node in 2 ways
1)
Through
Console 2) Using the AddNode Command:
v
From
the Admin Console: Select System Administration --> Nodes --> AddNode
Select Managed Node and click next then
specify the HostName of the Node to be added to the cell. Then select the
connector type (SOAP or RMI) and connector port. If security is enabled provide
user id and password and include application (if required).....
v
To use
AddNode command do the following 1) go to <ApplicationRoot> /bin then run
below command
Addnode.sh <dmgr_host_name>
<soap_port> -includeapps
The
-includeapps
parameter is optional. This parameter should only be used if there are
enterprise applications already installed on this node that need to be added to
the deployment manager's master configuration
If
security is enabled use the below command
addNode.sh
<deployment_manager_host> < deployment_manager_soap_port>
< -username > < admin_user_id> -password admin_password.
90) What
are diff between webserver and application Server?
1) Web Server handles only Http Protocols,
whereas application server can handle any type of protocols.
2) Web server just provides the infrastructure
for executing servlets, it is not provide any third party features like transaction,
connection pooling, clustering where as application server can provide all
these features.
3) In web server we can't run the
EJB, whereas in application server we can run the Ejbs.
4) Web server does not support
Multithreading where as application server supports.
91) What
is dump Namespace?
To diagnose a problem, you might
need to collect WAS JNDI information. WebSphere Application Server provides a
utility that dumps the JNDI namespace.
The dumpNamespace.sh script dumps
information about the WAS namespace and is very useful when debugging
applications when JNDI errors are seen in WAS logs. You can use this utility to
dump the namespace to see the JNDI tree that the WAS name server (WAS JNDI
lookup service provider) is providing for applications.
This tool is very useful in JNDI
problem determination, for example, when debugging incorrect JNDI resource
mappings in the case where an application resource is not mapped correctly to a
WAS-configured resource or the application is using direct JNDI lookups when
really it should be using indirect lookups
92) How
to configure heap size for Web Sphere application server?
Method 1: Using the administrative
console
Open the administrative console.
Navigate to Servers > Server
Types > WebSphere application servers > <servername>
Navigate to Server Infrastructure
> Java and Process Management > Process Definition
Navigate to Additional Properties >
Java Virtual Machine > General Properties
Define the values (in MB) for
‘Maximum heap size’ and/or ‘Initial heap size’.
Restart the server.
Note: If the heap size is already
low, the administrative console might not open. In such cases, use some other
method to configure the heap size.
Method 2: By editing the
configuration files
This method should be used with
caution.
Search for a file named server.xml
in your WebSphere installation.
Generally, the location of this
file is as follows:
<Profilehome>/config/cells/<cellname>/nodes/<nodename>/servers/<servername>
Select the server.xml specific to
your server and edit it to add/modify/delete the attributes @initialHeapSize
and @maximumHeapSize of the element <jvmEntries> The value of these
attributes is the heap size in MB.
For example:
<jvmEntries ...
initialHeapSize="2048" maximumHeapSize="3072" ...>
...
</jvmEntries>
93) What is the of Web Sphere variables?
·
Configuring WebSphere Application
Server path names, such as JAVA_HOME, and APP_INSTALL_ROOT.
·
Configuring certain cell-wide or
cluster-wide customization values
94) How to find out free diskspace
from command prompt?
du -sk (kb) du -sm (mb)
95) What is CellDiscoveryAddress
Node uses this port to talk to DMGR
96) What is
NodeDiscoveryAddress
DMGR uses this port to talk to node
97) How do you specify a jar file to be
used by the application, consider that you have many jar files in your system?
Classloader
98) How
to check port at operating system level????
Using netstat
–an | grep port no
Lsof
is list of open files command from we can know the pid of process which is
using the particular port.
Lsof
–i tcp|grep portnumber
99)
What is
the effect of changing max heap and min heap size of a jvm same?
Using the same values is not usually a good
idea, because it delays the start of garbage collection until the heap is full.
100)
What is
a heap dump? In what scenarios is a heap dump useful?
A heap dump is
a snapshot of all the objects in the Java Virtual Machine (JVM) heap at a
certain point in time .
It is useful in situations, most notable for
memory leak problems or memory allocation problems for example
OutOfMemoryExceptions.
101)
What
tools did you use to analyze heap dumps?
IBM HeapAnalyzer
102)
What
are the respective extensions (jdk 1.3 and 1.4) jdk 1.4 heap dump format
generates?
phd format
103)
What is
activity log and how do you view it.?
These are IBM Service logs which are in binary
format, which logs activity of various WebSphere Application Server components.
Log Analyzer is used to view the activity.log files.
104)
What
all parameters did you tune in WAS (other than JDBC connection pool and heap
sizes) ?
We can tune some of these
other aspects such as 1. Application server (parameter : ) 2. JVM tunings
(parameter : ) 3. Applications (parameter : ) 4. Database (parameter : ) 5. JMS
(parameter : ) 6. Security 7. Hardware capacity and settings (parameter : ) 8.
Operating System (parameter : ) 9. Web Servers (parameter : )
105)
WHEN
THE SERVER HUNG HOW WILL IDENTIFY IN SYSOUT.LOG?
Its very simple in
systemout.log we will find a particular thread is hung from this many milli
seconds will be found. The thread name will be WSVR****
106)
What is
the error HTTP 404 indicates and how to solve these issues?
The 404 or Not Found error message is an HTTP
standard response code indicating that the client was able to communicate with
the server but the server could not find what was requested..
107)
What is
the difference between page not found and HTTP 404? How to solve these issues?
The “Page not found” error is, the request is
not reaching the server. HTTP 404 errors is request is reaching to server but
whatever it is expecting it’s not found at expected location
108)
How
many levels we can enable the trace file?
LEVEL = all | entryExit | debug |
event
109)
If
memory leakage is there in then where (in which file) we get this inform-
ation?
Memory leakage information can get in the process logs ( Native_stdout
and Nat- ive_stderrer logs)
110)
How to determine Max Heap Size is too
large or too small for your
application.?
If GC takes a so long time to clean up objects
with large heap, you can reduce the maximum heap size.
If GC frequency is too high, the heap may be too
small for the application and GC needs to run frequently, so you may increase
the maximum heap size.
111)
Different Types of Session TimeOut can be
set ?
1)
Application level
2) Web Module level
3) Server level
112)
What is the importamt config file located
in ihs http server and where it is located ?
Important
file is: httpd.conf
Path:-/opt/IBM/HTTPServer/conf
113)
How to find out which version of ihs
server you are using ?
Go
to the installation directory of the Web server.
Find
the subdirectory that contains the executable,
Execute
the command
windows:
apache.exe -V
Linux
: ./httpd -v
Aix/solaris
: ./apachectl –v
114)
How can you check if your
httpserver(or)web server is running or not?
Netstat
-antp| grep httpd
115)
How To disable HTTPS request ?
To
disable HTTPS transport
<Transport
Hostname=“myhost.com" Port="9445" Protocol="https">
Servers->
Application Servers -> <ServerName> -> Web Container settings ->
Web Container Transport Chains
Click
“WCInboundDefaultSecure” for HTTPS transport
Uncheck
Checkbox “ “Enabled”
Save
and Generate Plugin-cfg.xml
116)
what is Sticky and Non-Sticky requests ?
Sticky
request
•Session
Affinity is established and request needs to be route to affinity Server
Non-Sticky
Request
•Session
Affinity is NOT established
•New
request
117)
What is the default location of a
thread dump and what is the format?
Location
of thread dump is profile_root/logs/server_name
118)
How to change SERVER_LOG_ROOT path ?
The
default path for filename is the value of the variable SERVER_LOG_ROOT. To see
the value of the SERVER_LOG_ROOT variable:
1. On the administrative console, select
Environment > WebSphere® Variables
2. Click on the Server radio button, and
then click Apply. The value of the SERVER_LOG_ROOT variable appears in the
resulting list.
To
change the value of SERVER_LOG_ROOT:
1. Select SERVER_LOG_ROOT
2. Enter a new path in the Value field
3. Click Apply
4. Save the configuration. You will have
to restart the server for the change to take effect.
You
can also change the location and name of the ${SERVER_LOG_ROOT}/SystemOut.log
and ${SERVER_LOG_ROOT}/SystemErr.log files to any other absolute path and
filename (for example, /tmp/myLogfile.log).
119)
What is the default log file size?
1MB
120)
What is the log rotation available?
Logs
can rotate by size or time
121)
122)
What is session
affinity?
Most servers use the term “Session Affinity”
to indicate that with in a cluster of servers, requests from the same client
always get routed back to same server. This eliminates the need to replicate
session data like HTTP session or Stateful session Beans.
Default
name for the Application Server session cookie is JSESSIONID
Application
Server Session JSESSIONID cookie is enabled and set through WebSphere
Administration console
Application
servers -> <Application ServerName> -> Session management ->
Cookies
JSESSIONID
cookie contains
CacheID
SessionID
CloneID
Only
CloneID is used by WebSphere Plug-in for Session Affinity
For
Session Affinity to work a few things must be setup
1.Cluster
environment is created
2.JSESSIONID
Cookie is enabled by the Application Server
3.CloneID
is generate to the Plugin-cfg.xml , after Cookie has been setup and Enabled in
the Application Server
CloneID
is set on the response from Application Server
Once
CloneID (15d2hi3ic) is set in JSESSIONID Cookie then affinity to this
particular server will be observed by the plug-in routing.
CLONEID
is parsed from JSESSIONID cookie and compared to the CLONEID in the
Plugin-cfg.xml
Plug-in
“Trace” level log entries compare request CloneID to the Application Server
CloneId in Plugin-cfg.xml
Match
CloneID in JSESSIONID cookie to plugin-cfg.xml CLONEID and Application Server
is selected
Server
is selected based on CloneID match
123)
Tivoli Performance Viewer ?
The
Performance Viewer allows monitoring for CPU usage, Java heap size usage,
thread pool sizes, JDBC connection pool sizes, among many other indicators. The
Performance Viewer is accessible from the administration console at: Monitoring
and tuning > Performance Viewer > Current activity > server_name. You
can then expand the different sections of interest and check on the indicators
to be monitored
124)
FFDC( first failure data capture)?
The first failure data capture (FFDC)
feature preserves the information that is generated from a processing failure
and returns control to the affected engines. The captured data is saved in a
log file for analyzing the problem. FFDC is intended primarily for use by IBM
Service. FFDC instantly collects events and errors that occur during the
WebSphere Application Server runtime. The information is captured as it occurs
and is written to a log file that can be analyzed by an IBM Service
representative.
125)
What is
collector tool? And how to run?
The collector tool gathers information about
your WebSphere Application Server installation and packages it in a Java
archive (JAR) file that you can send to IBM Customer Support to assist in
determining and analyzing your problem. Information in the JAR file includes
logs, property files, configuration files, operating system and Java data, and
the presence and level of each software prerequisite
Go to à
app_server_root/bin/collector.sh
126)
What is web container ?
A Web
container is a runtime environment for Web applications. It processes servlets,
JSP files, and other types of server-side components. Each application server
runtime has one logical Web container, which can be modified but not created or
removed. The runtime environment for Web components is called the Web
container. If one receive unexpected results in a Web browser (such as errors
or incorrect information), they might have a problem with the Web container.
This paper published by IBM takes reader through the steps of diagnosing Web
container problems for IBM WebSphere Application Server V6.1 on distributed and
IBM i5/OS platforms.
127)
What is PMI?
In
WebSphere application server, the core of the monitoring infrastructure is
‘Performance Monitoring Infrastructure’ known as PMI. The performance data
provided by WebSphere PMI helps to monitor and tune the application server
performance. PMI provides a comprehensive set of data that explains the runtime
and application resource behavior. For example, PMI provides database
connection pool size, servlet response time, EJB method response time, JVM
garbage collection time, CPU usage, and so on. This data can be used to
understand the runtime resource utilization patterns of the thread pool,
connection pool, and so on, and the performance characteristics of the
application components like servlets, JSP, and enterprise beans.
PMI data
can be monitored and analyzed by Tivoli Performance Viewer (TPV), other Tivoli
tools, your own applications, or third party tools. TPV is a graphical viewer
for PMI data that ships with Web Sphere Application Server.
128)
What is class loader?
A class loader is an object that is
responsible for loading classes.
By default in IBM Websphere
Application server the PARENT_FIRST option is selected for
class loading.
if delegation model is set to
PARENT_FIRST it will try to load from the application jars which are present in
WEB-INF/lib or WEB-INF/classes or
included in shared library references.
If the class expected is not
present in the application loader it will look up to it parent until Bootstrap.
So in PARENT_FIRST the look up for
classes is always upwards .If a class referenced by Ext loader is present in
application level then that class will not be visible and throw exception.
PARENT_LAST is just opposite to
PARENT_FIRST it look for classes
downwards from root classloader.
Classloader Policy : 2 types of Classloader Policies
1) Single 2) Multiple
Single:
Applications are not isolated from each other. Uses a single application class
loader to load all of the EJB modules, shared libraries, and JAR files which
are contained in all applications installed into the JVM.
Multiple:
Applications are isolated from each other. Gives each application its own class
loader to load the EJB modules, shared libraries, and JAR files
Classloader modes:
There are two possible values for a classloader mode. 1) PARENT_FIRST
2) PARENT_LAST
These
values can be changed using the WebSphere administrative console.
PARENT_FIRST
The PARENT_FIRST classloader mode
causes the classloader to first delegate the loading of classes to its parent
classloader (the classloader up one level in the classloader hierarchy) before
attempting to load the class from its local classpath. This is the default classloader
policy for all classloaders. This default can be changed for the classloaders
supplied by the WebSphere run time. It cannot be changed for the Java Virtual
Machine classloaders.
PARENT_LAST
The PARENT_LAST classloader mode
causes the classloader (the classloader up one level in the classloader
hierarchy) to first attempt to load classes from its local classpath before
delegating the classloading to its parent. This policy allows an application
classloader to override and provide its own version of a class that exists in
the parent classloader.
There are three Class loader mode
settings:
on an application server
on an application
on a web module
129)
What is Virtual hosts?
A virtual host is a configuration
entity that allows WebSphere Application Server to treat multiple host machines
or port numbers as a single logical host for configuration purposes. Each
virtual host can be associated with multiple aliases. Each alias is a
particular host name and port number. By combining multiple host machines into
a single virtual host or by assigning host machines to different virtual hosts,
you can separate and control which Web Sphere Application Server resources are
available for client requests.
When you configure WebSphere
Application Server, you can associate a virtual host to one or more Web
Modules. Each Web Module can be associated with one and only one virtual host.
Each virtual host represents a virtual configuration that can have one or more
Domain Name System (DNS) aliases. A DNS alias consists of a TCP/IP host name
and port number used to request the servlet (for example, yourhost:8000). A
virtual host can be associated with any number of DNS aliases.
A client request for a servlet,
JavaServer Pages (JSP) file, or related resource contains a DNS alias and a
Uniform Resource Indicator (URI) that is unique to that resource. When a client
request for a servlet, JSP file, or related resource is received, the DNS alias
is compared to the list of all known virtual host groups to locate the correct
virtual host, and the URI is compared to the list of all known URI groups to
locate the correct URI group.
If a matching virtual host group or
URI group is not found, an error is returned to the browser. If the virtual
host group and URI group are found, the request is sent to the corresponding
server group for processing and a response is returned to browser.
130)
What is
the WebSphere Application Server Console and what is it’s role? What is the
default URL and port for accessing it?
The administrative console is a browser-based
interface that allows you to configure application server settings, deploy and
manage applications, and perform additional tasks that are not included in the
HTTP Server Administration interface. It used to be a Java application, however
to be firewall safe it was made into a web-based application.
It runs on the default install port 9060 e.g
http:\\hostname:9060\ibm\console, however this can be changed by editing
virtual_hosts names. also when during installation ie GUI or response-file
install you can set the ports that will be used.
117) what are the regular
issues you get in production support and how you resolve them?
·
Usually
we get tickets from the operational team. Some of the call which we faced are
·
Out of Memory: If we get this error we need to
check for the standards configured in the application server. I mean heap
settings in the server and if not we need to resent according to the standards.
If you are getting this error frequently then we need to ask application team to
check for the memory leakage. We can get this statics from the Natice_stdout
and Native_stderr files.
·
No of
connections reached Check for the recommended connection pool size in the JDBC
driver. Check the unused connections. Temporarily increase the connection pool
size. After analyzing the logs and situation if required then recycle the ap
plication server to resolve the issue.
·
File System issue: Check the file system by
using DU Forward to the System admin team and coordinate for the resolution.
·
Thread Dump: Create the thread dump by issuing
kill-3 command and forward to the application team for analysis.
·
100% CPU utilisation: Check for the CPU
utilisation bye using TOPAS command. If required then kill some of the non
important process which are tak- ing more cpu %
·
HTTP errors like (HTTP 400,401,403,404,500,502
etc.)
ü
HTTP
400 (Bad Request): This error comes with because of syntax errors in the URL
which was typed by client. Need to provide the correct (updated) URL to the
users.
ü
HTP
401(UN authorised): This error comes after providing the credentials .that
means the provided credentials are not having the privileged access to the
requested content or page. We need to access for the requirement of the access
to the credentials if re- quire we need to add this user to the group to which
the privileged access is there for the particular page or content.
ü
HTTP
403 Forbidden: Edge component is not configured properly SSO configuration
might be not configured yet. WCP (WebSphere Catching component) there was
separate team for proxy configuration so no idea on this issue.
ü
HTTP
404 (Page not found or file not found): Need to check the system out file for
the logs and verify the ear file
ü
HTTP
500 internal errors: It is server-side error (Web server or application
server). Might be application server or web server or down. Need to recycle by
verifying the system out logs for analysis. HTTP 502 Bad Gateways: This might
be because of Network issue. To resolve this issue we need to engage the
Network team and coordinate for the solution.
.
131)
How does LDAP works ?
whenever we are going for LDAP user registry we
have to specify user id & password & type of directory server, port
number (default is 389), if SSL is enabled we have to specify port number as
636 and we have to specify Base distinguished name which indicates
authentication for users and we have to specify Bind distinguished name and
Bind password which specify authorization for user and we have to select
“Advanced Light Weight Directory Access Protocol user registry settings” there
we have to specify user filter classes and group filter classes (automatically
it will be there) and finally we have to restart the server.
for start the server " ./apchectl -k start "
for stopping the server " ./apchectl -k stop "
for restart the server " ./apchectl -k restart "
for stopping the server " ./apchectl -k stop "
for restart the server " ./apchectl -k restart "
133)
How
to determine Max Heap Size is too large or too small for your application.?
A) ----> If GC takes a so long time to clean up
objects with large heap, you can reduce the maximum heap size.
-----> If GC
frequency is too high, the heap may be too small for the application and
GC needs to run frequently, so you may increase the maximum heap size.
base
distinguished name is mainly for authorization and bind distinguished name is
to bind objects.
135)
How and
where to find the specific class?
Application classes will be available at
installed app path. If WAS classes, find out in WAS class path.
136)
What is
the pre requisite for syncnode command?
The node agent on the node must be in a
stopped state when this command is executed.
137)
What is
Synchronization? Types of Synchronization?
Synchronization is a
process of updating the nodes with master configuration repository changes. The
network deployment scenario of Web Sphere application server contains multiple
nodes managed by a Dmgr and Dmgr holds the master repository of configurations.
Any updates or changes through Dmr will be saved in the master configuration
and the nodes will be aware of these changes only after the synchronization.
The synchronization is
always from Dmgr to Nodes and it never happens vice versa. If you made any
changes from the node side it will be cleared during next synchronization
process.
Types of Synchronization
There are two types of Synchronization
1.) Partial
Synchronization: Here only the configuration file(s) which has changed at the
Dmgr level will be synchronized with nodes.
2.) Full Synchronization:
This will synchronize the entire master repository with the nodes.
138)
What are the default connection pool
values and How to view or set ?
Default connection pools is min=1
max=10
To
set the JDBC connection pool size:
- Log
in to the WebSphere® Application Server administrative console.
- Click Resources > JDBC > Data sources.
- Select the data source name for the object
store.
- In Data source panel, click Connection pool properties.
- Edit the value for Maximum connections to add 50
additional connections. For example, if the current maximum is 100, enter
150.
Tip: You might need to increase this value again if you experience
"SQLCODE [0] SQLSTATE [null]" errors after you InfoSphere Master
Content is configured and running.
Click Apply. Then, click Save.
139)
What are the default
threads pools value and How to view or set?
- How to view or set:
- Start the
administrative console.
- In the topology tree, expand Servers
and click Application Servers.
- Click the name of the application
server that you want to configure.
- Click Web Container.
- On the Web Container
page, click Thread Pool.
- Specify a value for the Maximum
size field.
- Click Apply or OK.
- Save the
configuration.
- Stop and restart the
application server.
- Default value: min=50 and max=50
140)
what are the Web Sphere Application
Server Important configuration Files?
WebSphere stores its configuration
to set of XML files. When we use the Admin console to configure WebSphere,
certain XML files are updated internally.
CELL-scope
1) admin-authz.xml
Contains the
roles set for administration of the Admin console.
<profile_root>/appsrv01/config/cells/<cell_name>/
2) profileRegistry.xml
Contains a list
of profiles and profile configuration data
3) resources.xml
Defines
operating cell scope environmental resources, including JDBC, JMS, JavaMail, URL end point
configuration, and so on.
4) security.xml
Contains
security data , including all user ID and password information.
5) virtualhosts.xml
Contains virtual
host and Multipurpose Internet Mail Extensions (MIME)-type configurations.
6) variables.xml
Contains cell
level WebSphere variables
7) wimconfig.xml
Contains the
federated repository configurations for global security
<profile_root>/config/cells/<cell_name>/wim/config/
NODE-scope
1) namestore.xml
Provides persistent JNDI namespace binding data
2) resources.xml
Defines node scope environmental resources, including JDBC, JMS,
JavaMail, URL end point configuration, and so on
3) serverindex.xml
Specifies all the ports used by servers on this node
4) variables.xml
Contains node level WebSphere
variables
SERVER-scope
1) resources.xml
Contains the configuration of resources, such
as, JDBC, JMS, JavaMail, and URL end points at server scope.
2) server.xml
Contains application server
configuration data
3) variables.xml
Contains server level variables
141)
Location of
Security.xml
xml file ?${PROFILE_HOME}/config/cells/${CELL_NAME}/It Contains
configuration data for the security service
Ex:/wsste/wasapps/profiles/jdwsdvgCell/jdwsdvg/config/cells/jdwsdvgCell
142)
Location of server.xml file?
${PROFILE_HOME}/config/cells/${CELL_NAME}/nodes/nodename/servers/servername.Ex:
wsste/wasapps/profiles/jdwsdvgCell/jdwsdvg/config/cells/jdwsdvgCell/nodes/jdwsdvgNodeccgfwsm30d/servers/jdwsdvgServer1.
143)
Location of serverindex.xml?
${PROFILE_HOME}/config/cells/${CELL_NAME}/nodes/nodenameEx:
wsste/wasapps/profiles/jdwsdvgCell/jdwsdvg/config/cells/jdwsdvgCell/nodes/jdwsdvgNodeccgfwsm30d/
144)
What is the use of variables.xml?
Contains configuration variables
used to specify directory paths. The variables can then be substituted for the
actual path when specifying locations for log files, JDBC implementation
classes, and application install paths.
145)
What is the use of virtualhosts.xml
Contains configuration data for
virtual hosts and their MIME types.
146)
How do you generate heap dump?
You can generate using was admin
script and by adding values in JVM custom properties
By using was admin script
a) Start the wsadmin scripting client.
You have several options to run scripting commands, ranging from running them
interactively to running them in a profile.
b) Invoke the generateHeapDump operation on a
JVM MBean, for example,
a. Finding JVM objectName:
b. <wsadmin> set objectName [$AdminControl
queryNames
WebSphere:type=JVM,process=<servername>,node=<nodename>,*]
c. Invoking the generateHeapDump operation on
JVM MBean:
<wsadmin>
$AdminControl invoke $objectName generateHeapDump
2) by adding values in JVM custom properties
Go
to Application Servers> server1> process Definition > java Virtual
Machine > custom properties
Add
below name and values
IBM_HEAPDUMPDIR=<appServer_log>
IBM_HEAPDUMPDIR_OUTOFMEMORY=true
IBM_HEAP_DUMP=true
147)
When will get the out of memory error?
In
many cases, like in the case of a memory leak, the second option is the only
sound choice. A memory leak happens when the application keeps more and more
references to objects and never releases them. The garbage collector will
therefore never collect those objects and less and less free memory will be
available until we reach the point where not enough free memory is available
for the application to function normally. At this point, the JVM will throw an
OOM.
148)
How and where you can set generic JVM
arguments for the WebSphere Application Server
The generic JVM arguments are used
to configure and adjust how the JVM executes
Any changes to JVM arguments needs restart of
that JVM
WebSphere Application Server
7.x/8.x
ü In
the Administration Console select Servers
ü Expand
Server Type and select WebSphere application servers
ü Click
on the name of your server
ü Expand
Java and Process Management and select Process Definition > Java Virtual
Machine
ü Scroll
down and locate the textbox for Generic JVM arguments
149)
Differences between WebSphere
Application Server 5.1,6.1and 7.0?
The
following differences between WAS 5.1, 6.1 and 7.0
WAS5.1:
There is no concept of profile in this version. There are 4 types’
installations
Those are Express, Base,
Network, Deployment and Enterprise.
WAS6.1:
Cell, Deployment Manager, Application Server, Custom profiles.
WAS7.0:
Cell, Application Server, Management, Custom Secure Proxy profiles.
Under Management profile there
are three types of profiles available
1. Administrative Agent
2. Deployment Manager
3. Job Manager
The
main use of job manager is to queue jobs to application server in flexible
management environment.
Managing
Profiles:
WAS5.1:
We can install the websphere installation instances using the wsinstance
script.
WAS6.1:
There are two types tools available in 6.1 version.
Those are 1. Profile Management
Tool (GUI)
2.
manageprofiles.bat (Command Interface).
WAS7.0:
Same as WAS6.1.
Security
Roles:
WAS5.1:
Administrator, Operator, Configurator.
WAS6.1:
Administrator, Operator, Configurator, Monitor, Admin Security Manager, ISC
Admin.
WAS7.0:
Administrator, Operator, Configurator, Deployer, Admin Security Manager, ISC
Admin,Auditor.
Supporting
WebServers:
WAS5.1:
Apache, HIS, IIS, Domino Server.
WAS6.1: Apache, IHS, IIS, Domino Server, SunOne.
WAS7.0:
Same as 6.1 versions.
User
Registries/Repositries:
WAS5.1:
Local Operating System, Standalone LDAP registry, Standalone Custom registry.
WAS6.1:
Federated Repositories, Local Operating System, Standalone LDAP registry,
Standalone Custom registry or file based registry
WAS7.0:
Same as 6.1
Logging
and Tracing:
WAS5.1:
Diagnostic trace log, JVM logs, Process logs, IBM Service logs.
WAS6.1:
Apart from the logs available in 5.1 there is a change log detail levels which
will enable the message level and
trace level of the JVM.
WAS7.0:
Same as 6.1.
Managing
WebServers:
WAS5.1:
Webservers cannot be managed from WebSphere Admin Console.
WAS6.1:
WebServers can be administered using the WebSphere Admin Console. WebServers
can be created in Managed node or in Unmanaged node.
WAS7.0:
Same as 6.1.
JMS:
WAS5.1:
JMS Fail Over Support and scalability is not available
WAS6.1:
JMS Fail over support and scalability is available.SIB(Service Integration Bus
is added)
WAS7.0:
Same as V 6.1
Monitoring
WAS5.1:
There is no monitoring tool available in this version.
WAS6.1:
TPV(Tivoli Performance Viewer) is embedded in the WebSphere Admin Console for
monitoring WebSphere Objects.
WAS7.0:
same as V 6.1
wsadmin
scripts
WAS5.1:
JACL is the scripting language which is used
WAS6.1:
JACL will be deprecated from 6.1 and Jython scripting will be used.
WAS7.0:
Same as V 6.1
150)
What are the different types of users
available in GLobal security ?
By default, WebSphere
provides few roles, those are listed below
|
Monitor
|
The monitor role can do the following:
• View the WebSphere Application Server configuration • View the current state of the Application Server |
|
Configurator
|
A configurator role can do the following:
• Create a resource • Map an application server • Install and uninstall an application • Deploy an application • Assign users and groups-to-role mapping for applications • Set up Java 2 security permissions for applications |
|
Operator
|
monitor privileges and can stop and start
the server
and monitor the server status in the administrative console. |
|
Administrator
|
An individual or group which can be assigned
this role will have the
operator and configurator privileges, plus additional privileges that are granted for administration. |
|
Iscadmins
|
Available to administrative console users.
Users who are granted this
role have administrator privileges for managing users and groups in the federated repositories. |
|
Deployer
|
Assigned users will have the ability
to completely deploy
an application and configure application runtime settings. |
|
Admin Security Manager
|
By using the Admin Security Manager role,
you can assign users and
groups to the administrative user roles and administrative group roles. |
Only for WebSphere v7
|
Auditor
|
This role allows users to modify the
configuration settings for security auditing and the role includes the
monitor role.
|
151)
What
are the regular commands is UNIX in use?
In our day to day activity we use the
following commands in unix:
§
To find
out the running processes the command is :Ps – ef| grep java
§
To find
out the disk space the command is :du
§
To find
out the file system the command is :df
§
To find
out the network performance/port info command is :netstat
§
To find
out the CPU utilisation the command is : topas/osstat
§
To kill
the running process the command is : kill -9 <PID>
§
To
generate heap/thresd dump the command is :kill -3 <PID>
§
To
change the privileges of the file/folder the command is : chmod
§
To
change the owner of the file/folder the command is :chown
§
To list
the file the command is : ls
§
To
create DIR(folder) the command is :mkdir
§
To TAR
the files ,folders we use the following command Tar –xvf <file name with
path> -- Tar – uvf --adding one or two files two folder Tar – cvf -- total
folder
§
To
schedule the job in cron command is as follwos Crontab –l ( to list all the
scheduled jobs) Crontab –e ( to edit the scheduled job) Whithin the crontab the
syntax for the schedule the script as follows Ex: 30 6 * * 1,3,5
/usr/bin/calender 30(minutes) 6 (hours) *(day of the month) * (month of the
year) 1,3,5 (day no of the week)/usr/bin/calender In the above example we
scheduled the script called calender which is located in the location
“/usr/bin” to run every Monday,Wednesday and friday
§
To find
fully qualified domain name (FQDN) if you know IP $ Nslookup <IP_ADDRESS>
--(vice versa)
152)
What is
the basic command in UNIX to find network performance?
Netstat
153)
How to search a file/Directory ?
find
. -type f -name <filename>
find
. -type d -name <DirectoryName>
154)
155)
Commands
to check CPU utilization?
Topas
used in AIX, Top is used in Linux
156)
What is
use of nmon?
The nmon command displays and records local
system information. The command can run either in interactive or recording
mode. If we specify any of the -F, -f, -X, -x, and -Z flags, the nmon command is in recording mode.
Otherwise, the nmon command is in interactive mode.
157)
How to check a particular
port is working or not in Unix?
netstat
-a | grep 80
158)
In ls -lrt, what t
stands for and r stands for l stands for?
-l shows you huge amounts of information
(permissions, owners, size, and when last modified.)
-r reverses the order of how the files are
displayed.
-t shows you the files in modification time
159)
What are the commands to check memory
usage on Linux?
a)
Free command: The
free command is the most simple and easy to use command to check memory usage
on linux
b)
The next way to check
memory usage is to read the /proc/meminfo file
Ex: cat /proc/meminfo
c)
Vmstat: The vmstat command with the s option, lays out the memory usage
statistics much like the proc command. Here is an example
Ex: Vmstat –s
160)
How do I determine
CPU and Memory utilization, based on running processes.
Use the TOP command in linux.
161)
What are the Vi editor modes?
Following two modes:
- Command mode:
This mode enables you to perform administrative tasks such as saving
files, executing commands, moving the cursor, cutting (yanking) and
pasting lines or words, and finding and replacing. In this mode, whatever
you type is interpreted as a command.
- Insert mode:
This mode enables you to insert text into the file. Everything that's
typed in this mode is interpreted as input and finally it is put in the
file .
Replacing Text:
The substitution command (:s/) enables you
to quickly replace words or groups of words within your files. Here is the
simple syntax:
:s/search/replace/g
The g stands for globally. The result of this
command is that all occurrences on the cursor's line are changed.
Searching
for Text
From Command Mode
/text Search forward (down) for text (text can include spaces
and characters with special meanings.)
?text Search backward (up) for text
n Repeat last search in the same direction
N Repeat last search in the opposite direction
fchar Search forward for a charcter on current line
Fchar Search backward for a character on current line
; Repeat last character search in the same direction
% Find matching ( ), { }, or [ ]
Substitutions
The simplest way to do substitutions over a range
of lines, or throughout the file, is to use the s colon command. The
basic form of this command is the following:
:n1,n2s/old/new/gc
n1 is the beginning line
n2 is the ending line number
s means to substitute text matching the pattern (old)
with text specified by (new)
g (global) is optional. It indicates you want to substitute
all occurrences on the indicated lines. If you use
g, the editor substitutes only the first occurrence
on the indicated lines.
c (confirm) is optional. It indicates you want to confirm
each substitution before vi completes it.
From Command Mode
:%s/old/new/g Substitutes old with new throughout the file
:.,$s/old/new/g Substitutes old with new from the current
cursor position to the end of the file
:^,.s/old/new/g Substitutes old with new from the beginning
of the file to the current cursor position
:& Repeats the last substitute (:s) command
162)
What is the use of Chmod?
Chmod is a Unix command to change
the permissions of files/directories
Sync: Chmod [options] mode [,mode]
file1 [files2..]
Ex: chmod –R 777 file/folder
The r,
w,
and x
specify the read, write, and execute access, respectively.
Numeric values for the read, write
and execute permissions:
Ø
read 4
Ø
write 2
Ø
execute 1
|
#
|
Permission
|
Rwx
|
|
7
|
full
|
111
|
|
6
|
read and write
|
110
|
|
5
|
read and execute
|
101
|
|
4
|
read only
|
100
|
|
3
|
write and execute
|
011
|
|
2
|
write only
|
010
|
|
1
|
execute only
|
001
|
|
0
|
|
Reference
|
Class
|
Description
|
|
U
|
User
|
the owner of the file
|
|
G
|
group
|
users who are members of the
file's group
|
|
O
|
others
|
users who are neither the owner of
the file nor members of the file's group
|
|
A
|
All
|
all three of the above, same as
ugo
|
163)
How do you know whether it is file or
directory ?
If it is a dash -
then that means it is a normal file. If it is a d
that that means it is a directory (folder).
164)
How do you check your file permissions.
After connecting to
your UNIX account, type the ls -l command to view information on files in your
current directory, including the file permissions
Permissions are listed as a set of 10 (sometimes 9) flags:
Position 1:
Specifies the type of file. This position will have the character ‘d’ if the
file is a directory or a ‘-‘ if it is not. In some programs, the first position
isn’t displayed at all if there is a ‘-‘ in the field.
Position 2-4: Specifies the permissions for the user.
Position 5-7: Specifies the permissions for groups.
Positions 8-10: Specifies permissions for the world.
165)
What is the use of tail command?
The tail command displays the last ten lines of the file.
The syntax
for the tail command is:
tail
[options] [file]
Options
|
Option
|
Description
|
|
-f
|
Follow the file as it
grows.
|
|
-r
|
Displays the lines in
the reverse order.
|
|
-n[k]
|
Displays the file at
the nth item from the end of the file.
|
|
+n[k]
|
Displays the file at
the nth item from the beginning of the file.
|
|
File
|
Name
of the file you wish to display
|
Examples
tail myfile.txt
The above
example would list the last 10 (default) lines of the file myfile.txt.
tail myfile.txt -n 100
The above
example would list the last 100 lines in the file myfile.txt.
tail -f myfile.txt
This next
example displays the last 10 lines and then updates the file as new lines are
being added. This is a great command to use to watch log files or logs in
real-time.
tail -f access.log | grep 24.10.160.10
Finally, if
you're trying to view a file such as the Apache access log file that is updated
frequently you can pipe its output through the grep command to filter out only the content you want. In this above
example, we're watching the access.log for any IP address of 24.10.160.10
166)
What is crontab ?
The crontab (cron
derives from chronos, Greek for time; tab stands for table)
command, found in Unix and Unix-like operating systems, is used to schedule
commands to be executed periodically. To see what crontabs are currently
running on your system, you can open a terminal and run:
$ sudo crontab -l
To edit the list of cronjobs
you can run:
$ sudo crontab -e
This wil open a the
default editor (could be vi or pico, if you want you can change the
default editor) to let us manipulate the
crontab. If you save and exit the editor, all your cronjobs are saved into
crontab. Cronjobs are written in the following format:
* * * * * /bin/execute/this/script.sh
Scheduling explained
As you can see there
are 5 stars. The stars represent different date parts in the following order:
·
minute (from 0 to 59)
·
hour (from 0 to 23)
·
day of month (from 1 to 31)
·
month (from 1 to 12)
·
day of week (from 0 to 6) (0=Sunday)
167)
How can I get number
of CPU’s & processors?
$ grep -c processor /proc/cpuinfo
4
$
grep CPU /proc/cpuinfo
model name : Intel(R) Xeon(R) CPU L7555
@ 1.87GHz
model name : Intel(R) Xeon(R) CPU L7555 @ 1.87GHz
model name : Intel(R) Xeon(R) CPU L7555 @ 1.87GHz
model name : Intel(R) Xeon(R) CPU L7555 @ 1.87GHz
$ grep cpu /proc/cpuinfo
cpu family : 6
cpu MHz : 1861.991
cpuid level : 11
cpu family : 6
cpu MHz : 1861.991
cpuid level : 11
cpu family : 6
cpu MHz : 1861.991
cpuid level : 11
cpu family : 6
cpu MHz : 1861.991
cpuid level : 11
.
168)
Coregroup:
Core group is a physical grouping of JVMs in a
cell that are candidates to host singleton services. It can contain stand-alone
servers, cluster members, Node Agents or the Deployment Manager, each of these
run in a JVM.
Each JVM process can only be a member of one core
group. Naturally, cluster members must belong to the same core group. At
runtime, the core group and policy configurations are matched together to form
high availability groups.
Nodegroup: grouping A node group is a new concept
in was 6.which is grouping of nodes within a cell that have a similar
capabilities.A node group is collection of managed nodes.
169)
HA Manager:
The high availability manager (commonly called
the HA manager) is a
component of WebSphere Application Server that
enhances the availability of
WebSphere Application Server singleton services
such as transaction or
messaging services. It provides a peer recovery
mechanism for in-flight
transactions or messages among clustered
application servers. It also supports
memory-to-memory session replication
170)
171)
What
is Workload Management?
Workload Management (WLM) is a WebSphere facility
that provides load balancing and affinity between application servers in a
WebSphere clustered environment. WLM is an important fact of performance. Web
Sphere uses workload management to send requests to alternate members of the
cluster
172)
What is Load
Balancer?
Load
Balancer is a software solution for distributing incoming client requests
across servers. It boosts the performance of servers by directing TCP/IP
session requests to different servers within a group of servers; in this way,
it balances the requests among all the servers
173)
What are the advantages of using Load Balancer?
Scalability As the number of client requests
increases; you can add servers dynamically, providing support for tens of
millions of requests per day, on tens or even hundreds of servers.
Efficient
use of equipment Load balancing ensures that each group of servers makes
optimum use of its hardware by minimizing the hot-spots that frequently occur
with a standard round-robin method.
Easy integration Load Balancer uses standard TCP/IP or
UDP/IP protocols. You can add it to your existing network without making any
physical changes to the network. It is simple to install and configure.
Low overhead using simple mac level forwarding
method, the Dispatcher component only looks at the inbound client-to-server
flows. It does not need to see the outbound server-to-client flows. This
significantly reduces its impact on the application compared with other
approaches and can result in improved network performance.
High availability The Dispatcher, Cisco CSS
Controller, and Nortel Alteon Controller components offer built-in high
availability, utilizing a backup machine that remains ready at all times to
take over load balancing should the primary server machine fail. When one of
the servers fails, requests continue to be serviced by the other server. This
eliminates any server as a single point of failure and makes the site highly
available
174)
What are the components of Load Balancer?
The
five components of Load Balancer are: Dispatcher, Content Based Routing (CBR),
Site Selector, Cisco CSS Controller, and Nortel Alteon Controller
175)
/Diff b/n IBM JDK and sun
JDK.
.The IBM and Sun JVMs have drastically different memory models,
which can significantly affect garbage collection performance. The Sun JVM uses
a generational garbage collector,
which performs better for short-lived objects and reasonably well if you
allocate a lot of memory to your JVM (using the
-Xms and-Xmx flags). It's typical when using the Sun JVM to use the same values
for the minimum and maximum heap sizes (e.g. -Xms1536m
-Xmx1536m). This works well for the
generational GC model because the Sun JVM will do minor garbage collections
periodically, sweeping only a small portion of the whole heap.
The IBM JVM, by default, does not use a generational garbage collector. You can instruct the IBM JVM to use one as a command line
switch (
-Xgcpolicy:gencon) but this is not the default. Keeping the default
non-generational garbage collector can improve performance for some
applications, but YMMV. With the IBM JVM, it's important to set -Xms as low as
possible and allow the JVM to grow the heap up to -Xmx as needed. If
you set both to the same value, as you might for the Sun JVM, you'll have very
high application performance up to the very first "Stop the world"
garbage collection. Then your application will hang for potentially minutes
while it scavenges the heap.
176)
Configuring
SSL at IHS Level?
Using
ikeyman utility or gsk7 command we wil create keydatabase(.kdb) file first then
based on requirement we will create certificates either selfsigned or CA
signed. For CA Signed we will create a CSR(Certificate Signing Request), for
self signed we will make use ikeyman utility or gsk7 cmd
Add Virtual Host definition for
HTTPS. This allows for the Definition of HTTPS on a separate virtual host from HTTP.
a) Edit the httpd.conf in <ihs_root>\conf.
We have to give the ssl module name
LoadModule
ibm_ssl_module modules/mod_ibm_ssl.soo a filend also other details like ssl
port no,ipadress,.kdb file path and etc.
17.Threadpool
A thread pool enables components of the server to reuse threads, which
eliminates the need to create new threads at run time. Creating new threads
expends time and resources.
We have different values like min size , max size, thread inactivity
timeout
Connection pool:
Connection pool is the set of connections to the database we have
different properties like max connections min connections aged timeout reap
timeout purge policy etc.
Thread pool vs connection pool
The dependency between these two pool setting is in maximum attribute.
Let us assume that your database can support maximum of 50 connections then it
is straight forward to configure the connection pool maximum attribute as 50.
But how this setting going to impact threads pool setting? Configure
application server thread pool as maximum of 100. In this scenario application
server will allow 100 request to be processed simultaneously however database
have only 50 connections. So only 50 thread will get connection another 50
thread will fight to get database connection hence connections will be switched
between threads frequently that will slow down overall application performance.
1)
Websphere Application Server configuration with LDAP
Server
Security is a critical aspect of any distributed application model. Most
of the firms have a centralized repository of the users in LDAP servers like
Active Directory, Novell LDAP.
This post
illustrates how you can configure authentication to the WebSphere Application
server using an Open DS LDAP commonly reffered as WebSphere LDAP
configuration.
Open DS is a
freeware and can be downloaded from the below site.
Steps to
configure:
1.
Setting up the global security.
Global security configuration applies to the security policy for all
administrative functions and is used as a default security policy for user
applications. Security domains can be defined to override and customize the
security policies for user applications.
Login to WebSphere 7 admin console, navigate to Security –> Global
Security.

Global
security settings
2.
Enable administrative security option.

3.
Configure user account repository.
Select “Standalone
LDAP Registry” from the drop down of “User
Account Repository” à configure

4.
Define the LDAP configuration details in the next page.
Specify the below properties.
Primary
administrative user name: Specifies the name of a user with
administrative privileges that is defined in your custom user registry
Type of LDAP Server: Since we are using Open DS for the illustration,
select ‘Custom’ from the drop down.

Click on “Test Connection” button to check the ldap configuration
settings. Save the changes
5. Modify
the Advanced LDAP User Registry Settings.
Define the User Filter to use (objectclass=inetOrgPerson), since it resonates to the LDAP user
registry objectclass settings.

6. Set
the LDAP registry as Current realm definition.

7.
Restart the WebSphere Application server.
8.
Login into the admin console using the operator from the LDAP Server.
2)
How do you create a profiles?
The following commands can be useful for
managing profiles:
|
Table 1.
Profile commands
|
|
|
Task
|
Command
|
|
Delete a profile
|
WAS_HOME/bin/manageprofiles.[sh|bat] -delete -profileName profile name
|
|
Refresh the profile
registry (for example, after deleting a profile)
|
WAS_HOME/bin/manageprofiles.[sh|bat]
-validateAndUpdateRegistry
|
|
List existing profiles
|
WAS_HOME/bin/manageprofiles.[sh|bat] -listProfiles
|
WAS_HOME is equal to where WebSphere
Application Server Network Deployment is
installed, for example, /opt/IBM/WebSphere/AppServer/ or C:\Program Files\IBM\WebSphere\AppServer\
To create WebSphere
Application Server Network Deployment
profiles, follow these steps:
Procedure
- Source
the setupCmdLine.[sh|bat] script in the bin directory of the WAS_HOME
folder to set the WebSphere
Application Server Network Deployment
environment to the configuration instance. WAS_HOME
is typically in /opt/IBM/WebSphere/AppServer or C:\Program
Files\IBM\WebSphere\AppServer\.
- Create
a profile ports file for the ctgDmgr01 profile. This file
is used with the manageprofiles command to
set the ports used by this profile.
Note: It is important that you ensure no spaces appear after any value
in this file. This circumstance can sometimes occur when cutting and pasting an
example. If there is an extra space trailing any of the values WebSphere uses
that space as the last character of that value. For example, you specify the
value WC_adminhost=9060, but an extra space is typed after 9060. The value is interpreted
as WC_adminhost=9060<sp> (where <sp> represents a space character).
- Open
a new text file named _portdef_DMgr.props and enter the following text:
CSIV2_SSL_SERVERAUTH_LISTENER_ADDRESS=9403WC_adminhost=9060DCS_UNICAST_ADDRESS=9352BOOTSTRAP_ADDRESS=9809SAS_SSL_SERVERAUTH_LISTENER_ADDRESS=9401CELL_DISCOVERY_ADDRESS=7277SOAP_CONNECTOR_ADDRESS=8879ORB_LISTENER_ADDRESS=9100CSIV2_SSL_MUTUALAUTH_LISTENER_ADDRESS=9402WC_adminhost_secure=9043
- Place
the file in the WAS_HOME
directory.
- Create
the ctgDmgr01 profile using the manageprofiles
command. Type the following command, all on one line, with a space between
each entry:
WAS_HOME/bin/manageprofiles.[sh|bat]
-create-templatePathWAS_HOME/profileTemplates/dmgr
-hostNameyourfullyqualifiedhost
-profileName ctgDmgr01-profilePathWAS_HOME/profiles/ctgDmgr01
-portsFileWAS_HOME/_portdef_DMgr.props
-cellName ctgCell01 -nodeName ctgCellManager01-enableAdminSecurity "false"
- Start
the ctgDmgr01 server:
WAS_HOME/profiles/ctgDmgr01/bin/startManager.[sh|bat]
- Create
a profile ports file for the ctgAppSrv01 profile. This file
is used by the manageprofiles command to
set the ports that are used by this profile.
- Open
a new text file named _portdef_AppSvr.props and enter the following text:
CSIV2_SSL_SERVERAUTH_LISTENER_ADDRESS=9201DCS_UNICAST_ADDRESS=9353NODE_DISCOVERY_ADDRESS=7272NODE_IPV6_MULTICAST_DISCOVERY_ADDRESS=5001BOOTSTRAP_ADDRESS=2809SAS_SSL_SERVERAUTH_LISTENER_ADDRESS=9901SOAP_CONNECTOR_ADDRESS=8878NODE_MULTICAST_DISCOVERY_ADDRESS=5000ORB_LISTENER_ADDRESS=9101CSIV2_SSL_MUTUALAUTH_LISTENER_ADDRESS=9202
- Place
the file in the WAS_HOMEdirectory.
- Create
the ctgAppSrv01 profile using the manageprofiles
command:
WAS_HOME/bin/manageprofiles.[sh|bat]
-create-templatePathWAS_HOME/profileTemplates/managed
-hostNameyourfullyqualifiedhost
-profileName ctgAppSrv01-profilePathWAS_HOME/profiles/ctgAppSrv01
-cellName ctgNodeCell01 -nodeName ctgNode01-portsFileWAS_HOME/_portdef_AppSvr.props
-dmgrHostyourfullyqualifiedhost
-dmgrPort 8879-isDefault
- Start
the ctgAppSrv01 node.
WAS_HOME/profiles/ctgAppSrv01/bin/startNode.[sh|bat]
- Augment
the ctgDmgr01 profile:
WAS_HOME/bin/manageprofiles.[sh|bat]
-augment-templatePathWAS_HOME/profileTemplates/iscae71
-profileName ctgDmgr01-serverName dmgr
- Restart
servers.
WAS_HOME/profiles/ctgDmgr01/bin/stopManager.[sh|bat]
WAS_HOME/profiles/ctgDmgr01/bin/startManager.[sh|bat]
WAS_HOME/profiles/ctgAppSrv01/bin/stopNode.[sh|bat]
WAS_HOME/profiles/ctgAppSrv01/bin/startNode.[sh|bat]
- Start
firststeps.[sh|bat] and select the Installation Verification option to
confirm that your server has been properly installed and started.
WAS_HOME/profiles/ctgDmgr01/firststeps/firststeps.[sh|bat]
3)
How do you
install web sphere?
·
Installation
Steps:
1) Untar the IBM Websphere Application Server 7 archive.
1) Untar the IBM Websphere Application Server 7 archive.
·
# tar -xzvf
was.7000.wasdev.nocharge.linux.amd64.tar.gz
·
2) Create a responce file for silent
installation
·
# cat > responce.text <<
EOF
·
-OPT
silentInstallLicenseAcceptance="true"
·
-OPT
disableOSPrereqChecking="true"
·
-OPT installType="installNew"
·
-OPT
profileType="standAlone"
·
-OPT feature="noFeature"
·
-OPT
PROF_enableAdminSecurity="true"
·
-OPT
PROF_adminUserName="wasadmin"
·
-OPT
PROF_adminPassword="password"
·
-OPT
PROF_profileName="appsvr01"
·
-OPT
PROF_defaultPorts="true"
·
-OPT installLocation="/opt/IBM/WebSphere/AppServer"
·
-OPT traceLevel="INFO"
·
EOF
·
It is also worth noting that in the WAS directory in the expanded installation archive, there is a sample response file named "responsefile.base.txt". Have a look at this file, it should give you a good idea of what options are supported without needing to read through thousands of pages of documents.
3) cd to WAS directory and execute the install.sh with the following arguments
·
# ./install -is:javaconsole -options
responce.text -silent
·
Or
·
# install -options responce.text
-silent -log # !/root/was_install_log.txt
@ALL
·
to log all installation messages.
The "-is:javaconsole" argument tells the installer to print the output to stdout. Unfortunately, on my server, this doesn't work as it gives this warning message and terminates the installation process :-(
The "-is:javaconsole" argument tells the installer to print the output to stdout. Unfortunately, on my server, this doesn't work as it gives this warning message and terminates the installation process :-(
·
WARNING: could not write using log
service: java.lang.IllegalStateException: proxy has been closed
·
I had to remove the argument, clean the installation directory and re-run the installation for a successful outcome.
4) During the installation process, you could watch the progress by tail-ing the log file located in ~/waslogs directory. (In the first-time installation, a temporary log file directory is always created in the home directory of the current user)
·
# tail -f ~/waslogs/log.txt
·
(Jun 18, 2012 11:47:17 AM), Process,
·
complete: 90%
·
5) Take note of the the last line of the installation log, you should see an exitcode = 0.
5) Take note of the the last line of the installation log, you should see an exitcode = 0.
·
(Jun 18, 2012 12:18:02 PM), Process,
com.ibm.ws.install.ni.ismp.actions.SetExitCodeAction, msg1, CWUPI0000I: EXITCODE=0
·
The installation takes about 5 minutes to complete on my i5-3550 machine.
By now, the installation has been completed successfully. Lets examine the installation. First, start the default server 'server1' of our profile appsvr01.
To start the server:
1) cd to the [was_install_dir]/profile/appsvr01/bin
2) execute the startServer.sh script with "server1" as the argument. "server1" is the default server of a profile.
·
root@ubuntu12svr01:/opt/IBM/WebSphere/AppServer/profiles/appsvr01/bin#
./startServer.sh server1
·
ADMU0116I: Tool information is being
logged in file
·
/opt/IBM/WebSphere/AppServer/profiles/appsvr01/logs/server1/startServer.log
·
ADMU0128I: Starting tool with the
appsvr01 profile
·
ADMU3100I: Reading configuration for
server: server1
·
ADMU3200I: Server launched. Waiting
for initialization status.
·
ADMU3000I: Server server1 open for
e-business; process id is 29695
·
The application server instance server1 is now started. The default secured listener port of this instance is 9043, try hitting https://server-ip:9043/admin yields the following.
The application server instance server1 is now started. The default secured listener port of this instance is 9043, try hitting https://server-ip:9043/admin yields the following.
·


·
Just add the exception and tell the browser to connect to the server, the following log-in screen will be displayed.
Just add the exception and tell the browser to connect to the server, the following log-in screen will be displayed.
·


·
Enter the username and password you specified earlier in the responce.text file and login. Voila you are in!
Enter the username and password you specified earlier in the responce.text file and login. Voila you are in!
·


As far as the installation goes, it has been successful.
If you want to repeat the exercise, just follow the following steps to uninstall the entire installation, in silent mode.
Steps to uninstall:
1) Stop all servers
2) cd to [was_install_dir]/uninstall/
3) execute the uninstall script with the '-silent' argument
root@ubuntu12svr01:/opt/IBM/WebSphere/AppServer/uninstall#
./uninstall -silent
4) After the script exits, delete the entire IBM directory as well as a hidden directory ".ibm" in the /opt.
5) Delete the ~/waslogs directory, too.
1)
How to revert fixpack?
In this example we have a WebSphere 7.0.0.19 Cell on AIX
where we have a need to downgrade to 7.0.0.17
The diagram below shows that we have the Deployment Manager
Profile and Node 01 profile on the same LPAR. Node 02 is installed on a second
LPAR.

This means that we need to perform two fix pack removals.
One uninstall for DMGR and Node 01 and another for the second LAPR to deal with
Node 02.
When I look at the AIX file system, I found that the
UpdateInstaller was installed in /opt/IBM/WebSphere/UpdateInstaller,. However
the fixpack 19 PAK file had been removed due to space conservation. I had to
download Fixpack 19 from IBM.
Download FP 19 from FixCentral
Copied the 7.0.0-WS-WAS-AixPPC64-FP0000019.pak to
/home/<my_hme_directory>
I then chmod attributes as 777, then as wasadmin I copied to
/opt/IBM/Websphere/UpdateInstaller/maintenance
Optional: I then asked Unix team to mount the
<installation_repository) which required root access so I could copy the
downloaded FP for safe keeping and accountability purposes.
Verify the current version of WAS using versionInfo.sh for
example:
Result of versionIfo.sh
Node01:/opt/IBM/WebSphere/AppServer/bin>versionInfo.sh
Version 7.0.0.19
Edit the responsefile called uninstall.txt which is located
in the /opt/IBM/WebSphere/UpdateInstaller/responsefile folder
-W product.location=”/opt/IBM/WebSphere/AppServer”
-W backup.package=”7.0.0-WS-WAS-AixPPC64-FP0000019.pak”
Run the installer which is located in
/opt/IBM/WebSphere/UpdateInstaller/
./update.sh -options responsefiles/uninstall.txt –silent
Logs
Logs will be located in a folder with the same name as the
fixpack that is being uninstalled for example:
/opt/IBM/WebSphere/AppServer/logs/update/7.0.0-WS-WAS-AixPPC64-FP0000019.uninstall
Result you a re
looking for in the log file. Note the log file doesn’t exist until the fixpack
uninstall is complete.
Rest of output has been removed for simplicity…
(05-Dec-2011 08:18:13), Install,
com.ibm.ws.install.ni.ismp.actions.SetExitCodeAction, msg1, CWUPI0000I:
EXITCODE=0
(05-Dec-2011 08:18:13), Install,
com.ibm.ws.install.ni.ismp.actions.ISMPLogSuccessMessageAction, msg1,
INSTCONFSUCCESS
Result
Node01:/opt/IBM/WebSphere/AppServer/bin>versionInfo.sh
Version 7.0.0.17
2)
How to install update installer?
Download and unzip the Update
installer
edit the
responsefile.updiinstaller.txt file as follows (I have used /var/apps/was7 as
my Websphere Install root)
-OPT silentInstallLicenseAcceptance="true"
-OPT disableOSPrereqChecking="true"
-OPT
installLocation="/var/apps/was7/UpdateInstaller"
-OPT traceFormat=ALL
-OPT traceLevel=INFO
./install -options "/var/apps/was_7_fixpack/UpdateInstaller/responsefile.updiinstaller.txt"
-silent
While it is installing you can tail the log
tail -f /root/updilogs/log.txt
Install,
com.ibm.ws.install.ni.ismp.actions.ISMPLogSuccessMessageAction, msg1,
INSTCONFSUCCESS
Now that we have installed the required update installer, we
need to copy the the downloaded fix pack to
/var/apps/was7/UpdateInstaller/maintenance
When we run the update installer silently we will refer to
the above path
We are now going to update the response file for a silent
install of the Fix Pack
vi /var/apps/was7/UpdateInstaller/responsefiles/install.txt
Edit these lines:
-W
maintenance.package="/var/apps/was7/UpdateInstaller/maintenance/7.0.0-WS-WAS-LinuxX64-FP0000013.pak"
-OPT disableNonBlockingPrereqChecking="true"
-W product.location="/var/apps/was7"
Run the installer
cd /var/apps/was7/UpdateInstaller/
./update.sh -options responsefiles/install.txt -silent
/var/apps/was7/UpdateInstaller/java/jre/bin/java -cp
/var/apps/was7/UpdateInstaller/update.jar -Xms48m -Xmx384m run -options
/var/apps/was7/UpdateInstaller/responsefiles/install.txt -silent
1)
How do you
apply fix packs?
Procedure
Download the required fix pack from the
official IBM support Web site into< WAS-ROOT>/maintenance directory.
Ensure that all running processes have been
stopped.
Edit a response file . The one located at
the bottom of the pane can be used as an example. There are also sample
response files found in the <WAS-ROOT>/responsefiles directory.
Specify the location of the product to the
response file.
Specify the choice of install maintenance
in the response file. For example: -W update.type="install"
Add the maintenance location where packages
can be found to the response file.
Run the Update Installer.
For
example:
Windows
update.bat
-silent -options "responsefiles\file_name"
Vista
update.exe
-silent -options "responsefiles\file_name"
AIX,
Linux,Solaris
./update.sh
-silent -options "responsefiles/file_name"
Review the log file to verify maintenance
has been installed successfully. The log can be found
atapp_server_root/logs/update/maintenance_package.install. If for some reason
the maintenance package is not applicable to install, a log file found in
<WAS-ROOT>/logs/tempX will list the reason for the failure. The most
recent log file, tmpX, where X refers to the first available empty directory,
will be created to reflect the status for this attempted install. You might not
receive an error message for a failed installation in some cases. If you
silently install a maintenance package and you do not receive a response after
a short period of time, view the logs. If logs are not generated, then an
invalid or missing argument might be causing the installation to fail. Verify
the Update Installer syntax for the command line with the response files
install.txt and uninstall.txt, located in <WAS-ROOT>/responsefiles
Results
One of the
following results will appear in the log.
INSTCONFSUCCESS
:The operation was a success.
INSTCONFPARTIALSUCCESS
:The operation was partially successful, refer to the log for more details.
INSTCONFFAILED
:The operation failed, refer to the log for more details.
Example
The
following is an sample response file used by the Update Installer to install a
fix pack using the silent installer.
################################################################################
#
# This is
the silent install response file for installing maintenance packages
# using the
update installer.
#
# A common
use of an options file is to run the wizard in silent mode. This lets
# the
options file author specify wizard settings without having to run the
# wizard in
graphical or console mode. To use this options file for silent mode
#
execution, *uncomment* and modify the parameters defined within.
#
# Use the
following command line when running the wizard from the update
# installer
directory:
#
# update -options responsefiles/install.txt
-silent
#
# Please
enclose all values within a single pair of double quotes.
#
################################################################################
################################################################################
#
# This
section describes how to apply a maintenance package using the full
# filename
specifications to be installed.
# There are
three ways you can specify installing a maintenance package.
# They are
the following:
# (Use the
examples below and edit where appropriate.)
#
# 1.
Specify a single maintenance package full filename to be installed.
#
# For example:
# -W maintenance.package="C:\Program
Files\IBM\WebSphere\AppServer\UpdateInstaller\maintenance\PQ20029.pak"
#
# 2.
Specify a multiple maintenance package full filename to be installed.
# -
Use a semicolon to separate the full filename specifications.
# -
Update Installer will install the latest applicable maintenance in the
order ## listed.
#
# For example:
# -W
maintenance.package="C:\maintenance\PQ20029.pak;C:\maintenance\PK31008.pak;D:\6.1.0-WS-WAS-WinX32-FP0000001.pak"
#
# 3.
Specify a full folder name that contains the maintenance packages.
# Update Installer will install the latest
applicable maintenance in the order
# listed in
the folder.
#
# For example:
# -W maintenance.package="D:\UpdateInstaller\maintenance"
#
# Notes: If
no package is specified, maintenance packages from the default folder
# (such as,
UpdateInstaller_HOME/maintenance )
# will be installed.
#
-W
maintenance.package="D:\UpdateInstaller\maintenance\6.1.0-WS-WAS-WinX32-FP0000001.pak"
################################################################################
#
#
Prerequisite Checking
#
# The
update installer checks the system for prerequisites by default.
#
# Uncomment
the following option to notify the installer to continue with
# the
update and log the warnings even though prerequisite checking
# failed.
#
#-OPT
disableNonBlockingPrereqChecking="true"
################################################################################
#
# Used to
input the product install location that will be updated.
#
# such as,
-W product.location="C:\Program Files\IBM\WebSphere\AppServer"
#
# Note: The
product install location should always been specified, and it should
# always be
the full path.
#
-W
product.location="D:\Program Files\IBM\WebSphere\AppServer"
################################################################################
#
# Do not
edit these values.
#
#
-W
update.type="install"
2) How do you apply SSL?
Click SSL certificate and key management > Key stores
and certificates.
Click NodeDefaultTrustStore.
Click Signer certificates.
Click Add.
Specify the alias name for the new root signer
certificate, the certificate file name, certificate data type, and click OK.


·
Select Security > SSL certificate and key management. In the Related
Items list, click Key stores and certificates.
·
Click NodeDefaultKeyStore. In the Additional Properties list, click
Personal certificates.
·
If the new SSL certificate was generated using the current WebSphere
Application Server profile key store, enter the Key store password (the default
password is WebAS)
and click Get key store aliases. If the new SSL certificate was generated
externally and a key store file is available, select Key store file, specify
the key store file name, select the type (for example PKCS12), enter the key
store password and click Get Key File Aliases.
·
Select the certificate alias to import.
·
(Optional) Assign a new alias name to the imported certificate.
·
Click OK.
· Click Save to save the changes to the
WebSphere Application Server master configuration

·
Click SSL certificate and key management > Key stores and
certificates.
·
Click NodeDefaultTrustStore.
·
Click Personal certificates.
·
Select the check box associated with the old SSL certificate and click
Replace.
·
Verify that the new root signer certificate alias name is displayed in
the Replace with drop-down list.
·
Select both the Delete old certificate after replacement and Delete old
signers check boxes.
·
Click OK.
· Click Save to save the changes to the
WebSphere Application Server master configuration.

5)
How does
plugin works?
6)
How do you configure data source?
Configuring
the Web Sphere Application Server data source
Installed applications
use data sources as resources to obtain connection to relational databases. To
create these connections between an application and a relational database,
WebSphere® Application Server uses the driver implementation classes
that are encapsulated by the JDBC provider, which is an object that represents
vendor-specific JDBC driver classes to WebSphere Application Server. For access
to a relational databases, applications use the JDBC drivers and data sources
that you configure for WebSphere Application Server.
Procedure
- Start the WebSphere Application Server administrative
console.
- Click Security -> Global security.
- On the Configuration panel, under Authentication,
expand Java Authentication and Authorization Service and click J2C
authentication data.
- Click New and enter the Alias, User ID and
Password.
- Click Ok.
- On the WebSphere Application Server administrative
console, expand Resources. Expand JDBC then click JDBC
Providers.
- In the Scope section, choose the Node level from
the drop-down list.
- Click New to create a new JDBC driver.
- Select, in this order, the Database type, Provider
type, Implementation type and Name. The Name automatically fills based on
the implementation type you choose.
- Click Next and configure the database class
path. Click Next.
- On the Summary page, click Finish.
- Click Save to save your selections. The JDBC
providers page then appears.
- On the WebSphere Application Server administrative
console, click Data sources.
- Click New to create a new data source. Enter the
Data source name and the JNDI name, and choose the authentication alias
from the drop-down list in Component-managed authentication alias. The
JNDI name should match the datasourceName value set in wimconfig.xml. By
default, it is jdbc/wimDS.
Note: For Apache Derby v10.2 embedded databases, leave the
Component-managed authentication alias field set to NONE.
- Click Next.
- Enter the Database name and deselect the checkbox, Use
this data source in container managed persistence (CMP). Click Next.
- On the Summary page, click Finish.
- The Data sources page displays. Click Save, and
then select the check box for the authentication alias previously created.
Click Test Connection. The message should indicate that the
connection is successful. Ignore any warnings, and then click Next.
- Click Environment > WebSphere Variables.
- In the Scope section, select Cell from
the drop-down list.
- Click New to create a variable.
- In the Name field, enter VMM_JDBC_CLASSPATH.
- In the Value field, enter the complete path to
the JDBC driver library files separated by a colon (:) for UNIX or Linux
or a semicolon (;) for Windows. For example, the path to Linux or UNIX is
as follows:
/opt/IBM/SQLLIB/java/db2jcc.jar:/opt/IBM/SQLLIB/java/db2jcc_license_cu.jar.
- Click OK. Additionally, copy the specified JDBC
driver library files in the ${WAS_HOME}/lib directory of each installed
Web Sphere Application Server node.
- Save
the configurations, and restart Web Sphere Application Server.
How to raise PMR?
Login to PMR site and enter user name &
password.

Click on open a new service request

Enter your keywords
Type web sphere application server network
deployment in the enter your keywords box then it will display the web sphere
product list , select the product as per your requirement

Fill all the mandatory filed then click on continue
to proceed next page


Select either email me or call my daytime
number to support contact you about this
service request then click on create request.

This tutorial provides a
"jumping-off place" to get familiar with Memory Analyzer.
Step 1 - Getting a Heap
Dump
The Memory Analyzer
works with heap dumps . Such a heap dump contains information
about all Java objects alive at a given point in time. All current Java Virtual
Machines can write heap dumps, but the exact steps depend on vendor, version
and operation system. Find out more in the section Acquiring Heap Dumps .
For the purpose of this
tutorial, we use Java 6 and JConsole on Windows. Start your application with
Java 6, then start <jre6>/bin/jconsole.exe and select the
running application (in this case Eclipse):

Then, select the
operation dumpHeap from the com.sun.management.HotSpotDiagnostic MBean.
The first parameter p0 is the full path to the heap dump file.
Make sure you give it the file extension .hprof. The second parameter p1 should
be left at true as we are only interested in live objects.

Step 2 - The Overview
Open the heap dump
via File >  Open Heap Dump... to see the overview page.

On the right, you'll
find the size of the dump and the number of classes, objects and class loaders.
Right below, the pie
chart gives an impression on the biggest objects in the dump. Move your mouse
over a slice to see the details of the objects in the object inspector on the
left. Click on any slice to drill down and follow for example the outgoing
references.
Step 3 - The Histogram
Select the histogram from
the tool bar to list the number of instances per class, the shallow size and the retained size .

The Memory Analyzer
displays by default the retained size of individual objects. However, the
retained size of a set of objects - in this case all instances of a particular
class - needs to be calculated.
To approximate the
retained sizes for all rows, pick  icon
from the tool bar. Alternatively, select a couple rows and use the context
menu.
icon
from the tool bar. Alternatively, select a couple rows and use the context
menu.

Using the context
menu , you can drill-down into the set of objects which the selected
row represents. For example, you can list the objects with outgoing or incoming
references. Or group the objects by the value of an attribute. Or group the
collections by their size. Or or or...
One thing that makes the
Memory Analyzer so powerful is the fact that one can run any action on any set
of objects. Just drill down and slice your objects the way you need them.

Another important
feature is the facility to group any histogram by class loader,
packages or superclass .

Any decent application
loads different components by different class loaders. The Memory Analyzer
attaches a meaningful label to the class loader - in the case of OSGi bundles
it is the bundle id. Therefore it becomes a lot easier to divide the heap dump
into smaller parts.

Grouping the histogram
by packages allows to drill-down along the Java package hierarchy.

Grouping the histogram
by superclass provides an easy way to find for example all the subclasses of
java.util.AbstractMap, etc...

Step 4 - The Dominator
Tree
The dominator tree displays the biggest objects in the heap
dump. The next level of the tree lists those objects that would be garbage
collected if all incoming references to the parent node were removed.
The dominator tree is a
powerful tool to investigate which objects keep which other objects alive.
Again, the tree can be grouped by class loader (e.g. components) and packages
to ease the analysis.

Step 5 - Path to GC
Roots
Garbage Collections
Roots (GC roots) are objects that
are kept alive by the Virtual Machines itself. These include for example the
thread objects of the threads currently running, objects currently on the call
stack and classes loaded by the system class loader.
The (reverse) reference
chain from an object to a GC root - the so called path to GC roots - explains
why the object cannot be garbage collected. The path helps solving the
classical memory leak in Java: those leaks exist because an object is still
referenced even though the program logic will not access the object anymore.

Initially, the GC root
reached by the shortest path is selected.

Step 6 - The Leak Report
The Memory Analyzer can
inspect the heap dump for leak suspects, e.g. objects or set of objects which
are suspiciously big.

Learn more in this blog
posting: Automated Heap Dump
Analysis: Finding Memory Leaks with One Click .
Related
concepts
- The connection wait timeout exception indicates that
the application has waited for the number of seconds specified by the
connection timeout setting and has not received a connection. This
situation can occur when the pool is at maximum size and all of the
connections are in use by other applications for the duration of the wait.
In addition, there are no connections currently in use that the
application can share because either the connection properties do not
match, or the connection is in a different transaction.
For
a Version 4.0 data source, the ConnectionWaitTimeout object creates an
exception that is instantiated from the
com.ibm.ejs.cm.pool.ConnectionWaitTimeoutException class.
For
J2C connection factories, the ConnectionWaitTimeout object generates a resource
exception of the com.ibm.websphere.ce.j2c.ConnectionWaitTimeoutException class.
When
the error detection model is configured to exception mapping, later versions of
data sources issue an SQL exception of the com.ibm.websphere.ce.cm.ConnectionWaitTimeoutException
subclass. When the error detection model is configured to exception checking,
later versions of data sources issue an SQL exception of the
java.sql.SQLTransientConnectionException class with a chained exception of the
com.ibm.websphere.ce.cm.ConnectionWaitTimeoutException class.
- When the error detection model is configured to
exception mapping, the stale connection exception indicates that the
connection is no longer valid. When the error detection model is
configured to exception checking, the JDBC driver raises a JDBC 4.0
exception, such as java.sql.SQLRecoverableException or
java.sql.SQLNonTransientConnectionException, or the JDBC driver specifies
an appropriate SQLState to indicate that the connection is no longer
valid. Read the topic Stale connections for more information on this type
of exception.
- Entries are delimited by a ; (semicolon).
- Each entry consists of a key and value, where the key
is an error code (numeric value) or SQLState, which is text enclosed in
double quotes.
- Keys and values are are separated by = (equals sign).
For example, to remove
the mapping of SQLState S1000, add a mapping of error code 1062 to duplicate
key, and add a mapping of SQLState 08004 to stale connection, you can specify
the following value for userDefinedErrorMap:
"S1000"=;1062=com.ibm.websphere.ce.cm.DuplicateKeyException;"08004"=
com.ibm.websphere.ce.cm.StaleConnectionException
userDefinedErrorMap can be located in the administrative console
by selecting the data source and configuring the custom properties.newfeat
This situation can occur for many
reasons, including the following:
- The
application tries to get a connection and fails, as when the database is
not started.
- A
connection is no longer usable because of a database failure. When an
application tries to use a previously obtained connection, the connection
is no longer valid. In this case, all connections currently in use by the
application can get this error when they try to use the connection.
- The
connection is orphaned (because the application had not used it in at most
two times the value of the unused timeout setting) and the application
tries to use the orphaned connection. This case applies only to Version
4.0 data sources.
- The
application tries to use a JDBC resource, such as a statement, obtained on
a stale connection.
- A
connection is closed by the Version 4.0 data source auto connection
cleanup feature and is no longer usable. Auto connection cleanup is the
standard mode in which connection management operates. This mode indicates
that at the end of a transaction, the transaction manager closes all
connections enlisted in that transaction. This enables the transaction
manager to ensure that connections are not held for excessive periods of
time and that the pool does not reach its maximum number of connections
prematurely.
A negative ramification
does ensue, however, when the transaction manager closes the connections and
returns the connection to the free pool after a transaction ends. An
application cannot obtain a connection in one transaction and try to use it in
another transaction. If the application tries this, a stale connection
exception occurs because the connection is already closed.
In the case of trying to use an orphaned
connection or a connection that is made unavailable by auto connection cleanup,
a stale connection exception indicates that the application has attempted to
use a connection already returned to the connection pool. It does not indicate
an actual problem with the connection. However, other cases of a stale
connection exception indicate that the connection to the database has gone bad,
or stale. Once a connection has gone stale, you cannot recover it, and you must
completely close the connection rather than returning it to the pool.
Detecting stale connections.
When a connection to the database becomes stale,
operations on that connection result in an SQL exception from the JDBC driver.
Because an SQL exception is a rather generic exception, it contains state and
error code values that you can use to determine the meaning of the exception.
However, the meanings of these states and error codes vary depending on the
database vendor. The connection pooling run time maintains a mapping of which
SQL state and error codes indicate a stale connection exception for each
database vendor supported. When the connection pooling run time catches an SQL
exception, it checks to see if this SQL exception is considered a stale
connection exception for the database server in use.
Recovering from stale connections.
An application can catch a stale
connection exception, depending on the type of error detection model that is
configured on the data source:
- When the
error detection model is configured to exception mapping, the application
server replaces the exception that is raised by the JDBC driver with
StaleConnectionException. In this case, the application might trap for a
stale connection exception.
- When the
error detection model is configured to exception checking, the application
server still consults the error map in order to manage the connection
pool, but it does not replace the exception. In this case, the application
should not trap for a stale connection exception.
Applications are not required to explicitly identify a stale connection exception. Applications are already required to catch the java.sql.SQLException, and the stale connection exception or the exception that is raised by the JDBC driver, always inherits data from the java.sql.SQLException. The stale connection exception, which can result from any method that is declared to raise SQLException, is caught automatically in the general catch-block. However, explicitly identifying a stale connection exception makes it possible for an application to recover from bad connections. When application code identifies a stale connection exception, it should take explicit steps to recover, such as retrying the operation under a new transaction and new connection.
Example: Handling data
access exception - stale connection.
These code samples demonstrate how to
programmatically address stale connection exceptions for different types of
data access clients in different transaction scenarios.When an application receives a stale connection exception on a database operation, it indicates that the connection currently held is no longer valid. Although it is possible to get an exception for a stale connection on any database operation, the most common time to see a stale connection exception issued is after the first time the connection is retrieved. Because connections are pooled, a database failure is not detected until the operation immediately following its retrieval from the pool, which is the first time communication to the database is attempted. It is only when a failure is detected that the connection is marked stale. The stale connection exception occurs less often if each method that accesses the database gets a new connection from the pool.
Many stale connection exceptions are
caused by intermittent problems with the network of the database server.
Obtaining a new connection and retrying the operation can result in successful
completion without exceptions to the end user. In some cases it is advantageous
to add a small wait time between the retries to give the database server more
time to recover. However, applications should not retry operations
indefinitely, in case the database is down for an extended period of time.
Objects operating in a bean-managed
global transaction context begun in the same method as the database access.
A servlet
or session bean with bean-managed transactions (BMT) can start a global
transaction explicitly by calling begin() on a javax.transaction.UserTransaction
object, which you can retrieve from naming or from the bean EJBContext
object. To commit a bean-managed transaction, the application calls commit()
on the UserTransaction object. To roll back the transaction, the
application calls rollback(). Entity beans and non-BMT session beans
cannot explicitly begin global transactions.
If an object that
explicitly started a bean-managed transaction receives a stale connection
exception on a database operation, close the connection and roll back the
transaction. At this point, the application developer can decide to begin a new
transaction, get a new connection, and retry the operation.
179)
Connection pool settings in websphere?
For example, click ResourcesJDBC ProvidersJDBC_providerData Sourcesdata_sourceConnection Pool. The path for JMS queue connection
factories is: ResourcesJMS ProvidersDefault MessagingJMS Queue Connection
FactoryJMS_queue_connection_factoryConnection Pool
Properties.
Configuration
tab
Connection
Timeout
Specifies the interval, in seconds, after which a
connection request times out and a ConnectionWaitTimeoutException is thrown.This value indicates the number of seconds a request for a connection waits when there are no connections available in the free pool and no new connections can be created, usually because the maximum value of connections in the particular connection pool has been reached. For example, if Connection Timeout is set to 300, and the maximum number of connections are all in use, the pool manager waits for 300 seconds for a physical connection to become available. If a physical connection is not available within this time, the pool manager initiates a ConnectionWaitTimeout exception. It usually does not make sense to retry the getConnection() method; if a longer wait time is required you should increase the Connection Timeout setting value. If a ConnectionWaitTimeout exception is caught by the application, the administrator should review the expected connection pool usage of the application and tune the connection pool and database accordingly.
If the Connection Timeout is set to 0, the pool manager waits as long as necessary until a connection becomes available. This happens when the application completes a transaction and returns a connection to the pool, or when the number of connections falls below the value of Maximum Connections, allowing a new physical connection to be created.
If Maximum Connections is set to 0, which enables an infinite number of physical connections, then the Connection Timeout value is ignored.
|
Data type
|
Integer
|
|
Units
|
Seconds
|
|
Default
|
180
|
|
Range
|
0 to max int
|
Maximum
Connections
Specifies the maximum number of physical
connections that you can create in this pool. These are the physical connections to the backend resource. Once this number is reached, no new physical connections are created and the requester waits until a physical connection that is currently in use returns to the pool, or a ConnectionWaitTimeoutException is thrown. For example: If the Max Connections value is set to 5, and there are five physical connections in use, the pool manager waits for the amount of time specified in Connection Timeout for a physical connection to become free.
Knowing the number of connection pools that can potentially request connections from the backend (such as a DB2 database or a CICS server) helps you determine a value for the Maximum Connections property.
For multiple standalone application servers that use the same data source configuration, or J2C connection factory configuration, a separate physical connection pool exists for each server. If you clone these same application servers, WebSphere Application Server implements a separate connection pool for each clone.
All of these connection pools correspond to the same data source or connection factory configuration. Therefore all of these connection pools can potentially request connections from the same backend resource, at the same time. The single Maximum Connections value that you set on this console panel applies to every one of these connection pools. Consequently, setting a high Maximum Connections value can result in a load of connection requests that overwhelms your backend resource.
|
Data type
|
Integer
|
|
Default
|
10
|
|
Range
|
0 to maximum integer
If Max Connections is set to 0, the Connection
Timeout value is ignored. |
Tip: For better performance, set the value for the connection pool
lower than the value for the maximum thread pool connections of the Web
Container. Configure this setting by navigating to ServersApplication serversserverThread Pools, and modify the WebContainer property. Lower settings, such as
10-30 connections, perform better than higher settings, such as 100.
You can use the Tivoli Performance Viewer to find
the optimal number of connections in a pool. If the number of concurrent
waiters is greater than 0, but the CPU load is not close to 100%, consider
increasing the connection pool size. If the Percent Used value is consistently
low under normal workload, consider decreasing the number of connections in the
pool.
Minimum
Connections
Specifies the minimum number of physical
connections to maintain.If the size of the connection pool is at or below the minimum connection pool size, the Unused Timeout thread does not discard physical connections. However, the pool does not create connections solely to ensure that the minimum connection pool size is maintained. Also, if you set a value for Aged Timeout, connections with an expired age are discarded, regardless of the minimum pool size setting.
For example, if the Minimum Connections value is set to 3, and one physical connection is created, the Unused Timeout thread does not discard that connection. By the same token, the thread does not automatically create two additional physical connections to reach the Minimum Connections setting.
|
Data type
|
Integer
|
|
Default
|
1
|
|
Range
|
0 to max int
|
Reap Time
Specifies the interval, in seconds, between runs
of the pool maintenance thread.For example, if Reap Time is set to 60, the pool maintenance thread runs every 60 seconds. The Reap Time interval affects the accuracy of the Unused Timeout and Aged Timeout settings. The smaller the interval, the greater the accuracy. If the pool maintenance thread is enabled, set the Reap Time value less than the values of Unused Timeout and Aged Timeout. When the pool maintenance thread runs, it discards any connections remaining unused for longer than the time value specified in Unused Timeout, until it reaches the number of connections specified in Minimum Connections. The pool maintenance thread also discards any connections that remain active longer than the time value specified in Aged Timeout.
The Reap Time interval also affects performance. Smaller intervals mean that the pool maintenance thread runs more often and degrades performance.
To disable the pool maintenance thread set Reap Time to 0, or set both Unused Timeout and Aged Timeout to 0. The recommended way to disable the pool maintenance thread is to set Reap Time to 0, in which case Unused Timeout and Aged Timeout are ignored. However, if Unused Timeout and Aged Timeout are set to 0, the pool maintenance thread runs, but only physical connections which timeout due to non-zero timeout values are discarded.
|
Data type
|
Integer
|
|
Units
|
Seconds
|
|
Default
|
180
|
|
Range
|
0 to max int
|
Unused
Timeout
Specifies the interval in seconds after which an
unused or idle connection is discarded.Set the Unused Timeout value higher than the Reap Timeout value for optimal performance. Unused physical connections are only discarded if the current number of connections exceeds the Minimum Connections setting. For example, if the unused timeout value is set to 120, and the pool maintenance thread is enabled (Reap Time is not 0), any physical connection that remains unused for two minutes is discarded.
The accuracy and performance of this timeout are affected by the Reap Time value. See Reap Time for more information.
|
Data type
|
Integer
|
|
Units
|
Seconds
|
|
Default
|
1800
|
|
Range
|
0 to max int
|
Aged
Timeout
Specifies the interval in seconds before a
physical connection is discarded.Setting Aged Timeout to 0 supports active physical connections remaining in the pool indefinitely. Set the Aged Timeout value higher than the Reap Timeout value for optimal performance.
For example, if the Aged Timeout value is set to 1200, and the Reap Time value is not 0, any physical connection that remains in existence for 1200 seconds (20 minutes) is discarded from the pool. The only exception is if the connection is involved in a transaction when the aged timeout is reached, the application server will not discard the connection until after the transaction is completed and the connection is closed.
The accuracy and performance of this timeout are affected by the Reap Time value. See Reap Time for more information.
|
Data type
|
Integer
|
|
Units
|
Seconds
|
|
Default
|
0
|
|
Range
|
0 to max int
|
Purge
Policy
Specifies how to purge connections when a stale
connection or fatal connection error is detected. Valid values are EntirePool and FailingConnectionOnly.
|
Data type
|
String
|
|
Defaults
|
:
|
|
Range
|
EntirePool
All
connections in the pool are marked stale. Any connection not in use is
immediately closed. A connection in use is closed and issues a stale
connection Exception during the next operation on that connection. Subsequent
getConnection() requests from the application result in new connections to
the database opening. When using this purge policy, there is a slight
possibility that some connections in the pool are closed unnecessarily when
they are not stale. However, this is a rare occurrence. In most cases, a
purge policy of EntirePool is the best choice.
FailingConnectionOnly
Only the
connection that caused the stale connection exception is closed. Although
this setting eliminates the possibility that valid connections are closed
unnecessarily, it makes recovery from an application perspective more complicated.
Because only the currently failing connection is closed, there is a good
possibility that the next getConnection() request from the application can
return a connection from the pool that is also stale, resulting in more stale
connection exceptions.
The connection pretest
function attempts to insulate an application from pooled connections that are
not valid. When a backend resource, such as a database, goes down, pooled
connections that are not valid might exist in the free pool. This is
especially true when the purge policy is failingConnectionOnly; in this case,
the failing connection is removed from the pool. Depending on the failure,
the remaining connections in the pool might not be valid.
|
180)
When does GC cycle starts?
In IBM* i5/OS* V5R4, a new Java*
implementation called IBM Technology for Java was introduced. This new JVM*,
based on the same technology used by IBM JVMs on other platforms, offers
significant performance improvements and memory-footprint reductions for most
applications. While many applications will perform well with IBM Technology for
Java out of the box, some tuning will be necessary to get the best possible
performance. Perhaps the most crucial tuning parameters for most Java
applications are the garbage collection (GC) settings.
This article describes the most
important GC settings and how to tune them with IBM Technology for Java. While
the i5/OS Classic JVM (the only JVM implementation shipped in V5R3 and earlier)
has similar parameters with similar names, the effect of these values in IBM
Technology for Java is significantly different. As a result, the optimal tuning
of GC parameters is much different for the two JVM implementations.
Understanding Garbage
Collector
One of the key advantages of Java over
some other programming languages is the JVM's automatic memory management. Java
programmers don't have to free objects once they're no longer needed; instead,
the JVM finds objects no longer referenced and cleans them up automatically
through the GC process. When objects are created, they use memory allocated
from the Java heap. Once the GC collects the objects, the memory they were
using is marked as free, allowing the JVM to reuse it for new objects.
The GC runs in cycles. The JVM uses
several criteria to determine when a GC cycle should begin, but in most cases
it starts when there's not enough contiguous free space in the heap to allocate
memory for a new object. Several tuning parameters that affect GC operation are
available. The most important of these parameters change how much memory is
available in the Java heap; this has a direct impact on how frequently the GC
runs. Both the amount of memory used and the frequency of GC cycles can
significantly affect application performance.
The two most important tuning
parameters for GC are the initial heap size and the maximum heap size. The
initial heap size is the amount of memory initially allocated for the Java heap
when the JVM starts. The default initial heap size on i5/OS is 4 MB. In a new
IBM WebSphere* Application Server (WAS) 6.1 instance, the default is 50 MB. The
initial heap size can be changed with the - Xms parameter (when running
"java" from qsh or qp2term), with GCHINL - when using the Run Java
Program CL command (JAVA or RUNJVA) - or from the Servers >Application
Servers >YourServerName >Java and Process Management > Process
Definition >Java Virtual Machine page of the WAS administrative console.
The maximum heap size is the largest
the Java heap is allowed to grow. The default maximum heap size on i5/OS is 2
GB. In WAS 6.1, the default is 256 MB. The maximum heap size can be changed
using the - Xmx parameter, GCHMAX, or from the same page as the initial heap
size in the WAS administrative console.
Because the IBM Technology for Java
implementation shipped in V5R4 is a 32-bit Java implementation, it can address
a maximum of 4 GB of memory. Some of this is reserved for use by the operating
system and the JVM implementation. As a result, the upper limit to the maximum
heap size is 3328 MB (3.25 GB). Applications that use native code, the shared
class cache or memory-mapped files may have additional requirements for
non-Java-heap memory, restricting the maximum Java-heap size further. The
practical limit for most WAS applications is about 2500 MB.
Three key areas must be addressed when
tuning GC:
·
Ensure there's enough memory available to the JVM
·
Tune the maximum heap size
·
Tune the initial heap size
It's important to note that the first
two must be done concurrently; as you adjust the maximum heap size, the memory
requirements for the environment will change.
Run JVM With Enough Memory
The most important factor in looking
at Java or WAS performance is to make sure there's enough memory available to
the JVM - including enough for the maximum heap size plus additional memory for
use by the JVM, Just In Time compiler and other native code. While the amount
of this additional memory varies, 25 percent of the maximum heap size is a
reasonable rule. For example, if the maximum heap size is set to 1 GB, the
memory pool should have at least 1.25 GB of memory available.
The easiest way to ensure the JVM has
enough memory is by running in a pool dedicated to the JVM with at least this
amount of memory. If automatic performance adjust is turned on (QPFRADJ =='0'
or '1'), the minimum pool size should be set using Work With Shared Storage
Pool (WRKSHRPOOL) to ensure the memory in the pool doesn't fall below the
required amount.
If there are multiple jobs (Java or
non-Java) running in the same pool, ensure that the pool has enough memory for
all of them. For example, if Job A requires 0.5 GB of memory and Job B requires
0.75 GB of memory, the pool should have at least 1.25 GB.
Tune Your Maximum Heap Size
When tuning the IBM Technology for
Java environment, the most important tuning knob is the maximum heap size. If
the maximum heap size is too small, the application could fail with an
out-of-memory error when trying to allocate an object, or the JVM may perform
GC too frequently, resulting in excess CPU consumption and increased response
times. If the maximum heap size is too large, the JVM could use more memory
than necessary.
To tune the maximum heap size, start
by enabling verbose GC (see "Enabling Verbose Garbage Collection").
The verbose GC data can be viewed using the Extensible Verbose Toolkit (EVTK).
"Installing the Extensible Verbose Toolkit" offers more information.
Figure 1 shows a graph from EVTK with more highlights. The solid black line
represents the maximum-heap-size setting. The gray area represents the JVM'S
warm-up phase and is ignored.
The most important value to look at in
EVTK is the "used heap (after collection)" - the blue line in Figure
1. This is the amount of memory that's still being used by Java objects
immediately after each GC cycle. When GC is tuned properly, this value will
typically be between 50 percent and 70 percent of the maximum heap size. This
range is highlighted in green in Figure 1. The blue line falls within this
region, indicating that the maximum heap size is tuned well in this case.
If the used heap after GC is less than
50 percent of the maximum heap size, the maximum heap size can probably be
decreased, letting the application consume less memory. If the used heap after
GC is frequently more than 70 percent of the maximum heap size, it may be
possible to improve performance by increasing the maximum heap size. For
example, in Figure 2, the maximum heap size is set to 600 MB and the used heap
size is around 540 MB (about 90 percent of the maximum). This results in more frequent
GC cycles, and the heap must frequently be compacted to make room for new
objects. In this case, increasing the maximum heap size to between 768 MB and
1024 MB (and ensuring that the memory pool is large enough for this increased
memory use) could reduce the frequency of GC cycles, lower CPU consumption and
improve the maximum throughput of the application.
After changing the JVM configuration,
make sure the new settings actually helped. It might also be useful to collect
verbose GC data again with the new configuration and verify that the results
match expectations.
Tune the Initial Heap Size
Tuning the initial heap size is
somewhat less important than finding the right maximum heap size, but can still
improve performance, especially during startup and first touch. The JVM will
automatically adjust the heap size between the initial and maximum values based
on several factors. If the initial heap size is too small, several GC cycles
may run during startup, causing a delay. On the other hand, if the initial heap
size is too large, the JVM may use more memory than it really needs.
A good place to start with the initial
heap size is 25 percent of the value of the maximum heap size. Thus, if a JVM
has a 1 GB maximum heap size, set the initial heap size to 256 MB. This general
rule will work reasonably well for most applications.
Further tuning of the initial heap
size requires more work but can improve the application's startup and
first-touch times. To do this, we need to measure how large the heap grows with
a normal startup and touching a few screens. First, set the initial heap size
to a small value (such as the default 4 MB). Turn on verbose GC. Start the JVM
(or WebSphere instance) and perform a few actions from a single user. Don't let
other users access the JVM during this time. Look at the output from the
verbose GC to see the heap size. Set the initial heap size to that value.
Keeping in Tune
Tuning GC with IBM Technology for Java
is a simple way to improve the performance of Java applications. Keeping your
CG in tune with your workloads may make your performance sing.
For additional information about the
GC and more advanced tuning options, see the Java Diagnostics Guide 5.0 (www.ibm.com/developerworks/java/jdk/diagnosis/).
Different ways to find the Version of WAS
There are various ways to check the
versions of the WebSphere Application Server Installation
1.Executing VersionInfo.sh
2.Executing genVersionReport.sh
3.Using Wsadmin scripting command
4.Using Admin console
5.Viewing SystemOut.logs
1.Executing VersionInfo.sh
2.Executing genVersionReport.sh
3.Using Wsadmin scripting command
4.Using Admin console
5.Viewing SystemOut.logs
Method 1 : Executing
VersionInfo.sh
VersionInfo.sh script within the bin
directory will give following details
> Version of the WAS
> Bit type ie 32 bit or 64 bit
> Installation Path
> Architecture etc
> Version of the WAS
> Bit type ie 32 bit or 64 bit
> Installation Path
> Architecture etc
a) Navigate to the bin directory of
the WAS_HOME path
[root@mercury bin]#cd /opt/IBM/WebSphere/AppServer/bin
[root@mercury bin]#cd /opt/IBM/WebSphere/AppServer/bin
b) Execute ./versionInfo.sh
from the bin folder
[root@mercury
bin]#./versionInfo.sh

c) View the Output to find the Version
Details of the WAS ..
d) Use “#./versionInfo.sh
-long ” to get detailed output . It will include the fixes , ifixes
etc
e) Use “#./versionInfo.sh
-help” to get the other options for avaliable with versioninfo
Here in the below example the
version is highlighted in Yellow .
I have installed Websphere ND v8.0.0.5 with 32 Bit
I have installed Websphere ND v8.0.0.5 with 32 Bit
Method 2 : Executing
genVersionReport.sh
The genVersionReport command uses the versionInfo command to generate the versionReport.html report file in the current working directory. The report includes a list of installed fix packs and interim fixes. VersionReport.html can be opened with any borwser
The genVersionReport command uses the versionInfo command to generate the versionReport.html report file in the current working directory. The report includes a list of installed fix packs and interim fixes. VersionReport.html can be opened with any borwser
a) Navigate to the bin directory of
the WAS_HOME/bin path
[root@mercury bin]#cd /opt/IBM/WebSphere/AppServer/bin
[root@mercury bin]#cd /opt/IBM/WebSphere/AppServer/bin
b) Execute genVersionReport.sh
from the <WAS_HOME>/bin directory
[root@mercury bin]#
./genVersionReport.sh


c) It will create a file versionReport.html
in the bin directory as shown below

d) Open the versionReport.html
using a browser
Highlighted in Yellow is the Version
viz Websphere ND v8.0.0.5 with 32 Bit
Method 3 : Using Wsadmin
scripting command
The version details of WAS Installation can be found using the wsadmin commands too..
The version details of WAS Installation can be found using the wsadmin commands too..
a) Navigate to the
<profile_home>/bin directory
[root@mercury bin]# cd /opt/IBM/WebSphere/AppServer/profiles/wp_profile/bin
[root@mercury bin]# cd /opt/IBM/WebSphere/AppServer/profiles/wp_profile/bin
b) Get the Cell Name, Node Name and
Server Name of the JVM server
[root@mercury bin]# cd /opt/IBM/WebSphere/AppServer/profiles/wp_profile/config/cells/mercuryCell/nodes/
mercuryNode/servers/WebSphere_Portal
[root@mercury bin]# cd /opt/IBM/WebSphere/AppServer/profiles/wp_profile/config/cells/mercuryCell/nodes/
mercuryNode/servers/WebSphere_Portal
In My Example its as follows
Cell Name :mercuryCell
Node Name :mercuryNode
Server Name : WebSphere_Portal
Cell Name :mercuryCell
Node Name :mercuryNode
Server Name : WebSphere_Portal
c) Execute the wsadmin.sh and
provide the necessary credentials
[root@mercury bin]# ./wsadmin.sh
[root@mercury bin]# ./wsadmin.sh
d) Set the Server Variable using the
Cell , Node and Server Name from above step
wsadmin>set server [$AdminControl completeObjectName cell=CellName,node=NodeName,name=ServerName,type=Server,*]
wsadmin>set server [$AdminControl completeObjectName cell=CellName,node=NodeName,name=ServerName,type=Server,*]
For Eg
wsadmin>set server [$AdminControl completeObjectName cell=mercuryCell,node=mercuryNode,name=WebSphere_Portal,type=Server,*]
wsadmin>set server [$AdminControl completeObjectName cell=mercuryCell,node=mercuryNode,name=WebSphere_Portal,type=Server,*]
Output of the command WebSphere:name=WebSphere_Portal,process=WebSphere_Portal,platform=proxy,node=mercuryNode,
j2eeType=J2EEServer,version=8.0.0.5,type=Server,mbeanIdentifier=cells/mercuryCell/nodes/
mercuryNode/servers/WebSphere_Portal/server.xml#Server_1358966625559,cell=mercuryCell
,spec=1.0,processType=UnManagedProcess
j2eeType=J2EEServer,version=8.0.0.5,type=Server,mbeanIdentifier=cells/mercuryCell/nodes/
mercuryNode/servers/WebSphere_Portal/server.xml#Server_1358966625559,cell=mercuryCell
,spec=1.0,processType=UnManagedProcess

e) After the Server Variable is set
, Execute the “$AdminControl getAttribute $server
serverVersion“ to get the server Version.
wsadmin>$AdminControl
getAttribute $server serverVersion
The Output is similar to
VersionInfo.sh which is Websphere ND v8.0.0.5 and
its 32 Bit
f) Some More commands to get the
Platform Version and the Server Status
wsadmin>$AdminControl getAttribute $server platformVersion
wsadmin>$AdminControl getAttribute $server platformVersion

wsadmin>$AdminControl
getAttribute $server state
Method 4 : Using Admin console
a) Login to the WAS admin console
b) Click on the Welcome link on the left side
a) Login to the WAS admin console
b) Click on the Welcome link on the left side

Here we can see the versions
c) Alternatively we could get the
version from Product Information link
1) Navigate to Application servers > serverName .
Here my server name is “WebSphere_Portal”
1) Navigate to Application servers > serverName .
Here my server name is “WebSphere_Portal”
2) Click on Runtime tab

c) On the Runtime tab there is a link on the right Side “Product Information ” Link
c) On the Runtime tab there is a link on the right Side “Product Information ” Link
d) Click on Application servers > WebSphere_Portal > Product
Information > Product Report
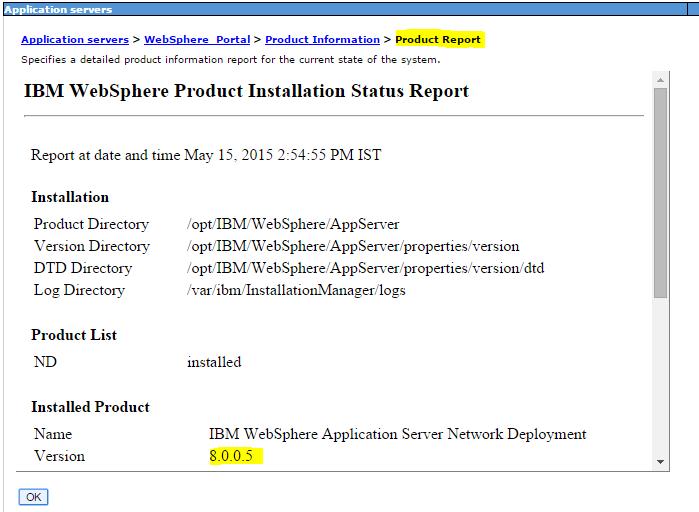
Here we will get the version Details of the WAS Version : Websphere ND v8.0.0.5
Method 5 : Viewing
SystemOut.logs
The Version of the WAS is also visible in the SystemLogs
When Ever a systemOut.log is created it appends the few parameters in the starting of the file
>Websphere Version and Build
>Host Operating System
>Java version
>was.install.root etc
The Version of the WAS is also visible in the SystemLogs
When Ever a systemOut.log is created it appends the few parameters in the starting of the file
>Websphere Version and Build
>Host Operating System
>Java version
>was.install.root etc
a) Navigate to the Logs folder of
the Websphere JVM process <profile_root>/logs/<serverName>
[root@mercury]#
cd /opt/IBM/WebSphere/AppServer/profiles/wp_profile/logs/Websphere_Portal
b) View the starting few lines
of the systemOut.log using vi or head or more command
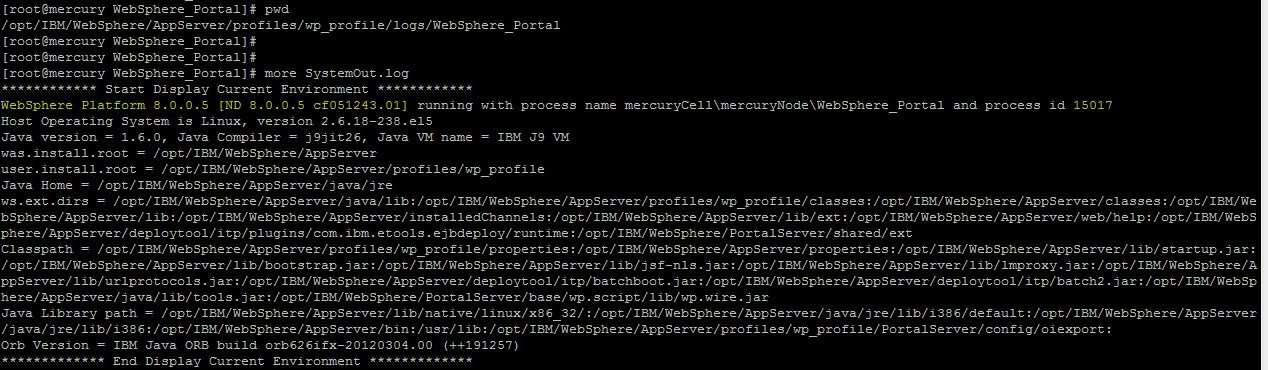
c) Here we can see the version
details of the WAS ie
WebSphere Platform 8.0.0.5 [ND 8.0.0.5 cf051243.01]
WebSphere Platform 8.0.0.5 [ND 8.0.0.5 cf051243.01]
Important IMCL Commands
1) Check the version of IBM Installation Manager
Command: ./imcl version
|
[root@wasnode tools]# pwd
/opt/IBM/InstallationManager/eclipse/tools [root@wasnode tools]# [root@wasnode tools]# ./imcl version Installation Manager (installed) Version: 1.6.2 Internal Version: 1.6.2000.20130301_2248 [root@wasnode tools]# |
=========================================================================
2) List Installed Packages
Command: ./imcl listInstalledPackages
|
[root@wasnode tools]# ./imcl
listInstalledPackages
com.ibm.cic.agent_1.6.2000.20130301_2248 com.ibm.websphere.IBMJAVA.v70_7.0.4001.20130510_2103 com.ibm.websphere.ND.v85_8.5.5003.20140730_1249 |
====>
com.ibm.websphere.IBMJAVA.v70_7.0.4001.20130510_2103 JAVA SDK
====> com.ibm.websphere.ND.v85_8.5.5003.20140730_1249 WAS ND 8.5
====> com.ibm.websphere.ND.v85_8.5.5003.20140730_1249 WAS ND 8.5

=========================================================================
3) List Installed Directory
Command: ./imcl listInstallationDirectories
|
[root@wasnode tools]# ./imcl
listInstallationDirectories
/opt/IBM/WebSphere/AppServer |
The Installation of WAS ND and SDK
is done at “/opt/IBM/WebSphere/AppServer”

=========================================================================
4) Uninstalling packages by using imcl
Command: ./imcl uninstall
Uninstall packages from the tools directory by using Installation Manager command line (imcl) uninstall commands.
Before you begin
•To identify the package_id_version,feature_id, run the listAvailablePackages command.
Uninstall packages from the tools directory by using Installation Manager command line (imcl) uninstall commands.
Before you begin
•To identify the package_id_version,feature_id, run the listAvailablePackages command.
Procedure
To uninstall a package by using imcl:
a) Navigate to the tool directory
b) Run the uninstall command: using imcl
To uninstall a package by using imcl:
a) Navigate to the tool directory
b) Run the uninstall command: using imcl
imcl uninstall
package_id_version,feature_id -installationDirectory installation_directory
NOTE : There are many options available with imcl, use that as
per your requirement
c) List the Installed packages to
verify the packages you want to uninstall
BE VERY CAREFUL BEFORE YOU SELECT THE PACKAGE IDs .. Bcoz there may be many Other Websphere Packages installed on different directories
BE VERY CAREFUL BEFORE YOU SELECT THE PACKAGE IDs .. Bcoz there may be many Other Websphere Packages installed on different directories
|
[root@wasnode tools]# ./imcl
listInstalledPackages
com.ibm.cic.agent_1.6.2000.20130301_2248 com.ibm.websphere.IBMJAVA.v70_7.0.4001.20130510_2103 com.ibm.websphere.ND.v85_8.5.5003.20140730_1249 |
d) List the directories where the
Websphere Packages are installed
BE VERY CAREFUL BEFORE YOU SELECT THE PACKAGE IDs .. Bcoz There many be many Other Websphere Packages installed on different directories
BE VERY CAREFUL BEFORE YOU SELECT THE PACKAGE IDs .. Bcoz There many be many Other Websphere Packages installed on different directories
|
[root@wasnode tools]# ./imcl
listInstallationDirectories
/opt/IBM/WebSphere/AppServer [root@wasnode tools]# |
Here I have only one location where
WAS is installed
e) Launch the uninstall option for
imcl command line
|
[root@wasnode tools]# ./imcl
uninstall com.ibm.websphere.ND.v85_8.5.5003.20140730_1249 com.ibm.websphere.IBMJAVA.v70_7.0.4001.20130510_2103
-installationDirectory /opt/IBM/WebSphere/AppServer
[root@wasnode tools]# |
6) Validate it using “imcl
listInstalledPackages” to ensure the WAS packages are removed
|
[root@wasnode tools]# ./imcl
listInstalledPackages
com.ibm.cic.agent_1.6.2000.20130301_2248 [root@wasnode tools]# |
7) Delete the WAS Installed Folders
post un-installation
/opt/IBM/WebSphere/AppServer
/opt/IBM/WebSphere/AppServer
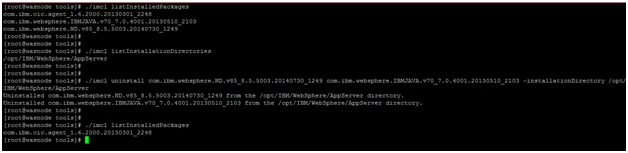
Video
This is how we uninstall WAS ND
=========================================================================
=========================================================================
4) List Available Packages in the Repositories
Command: ./imcl listAvailablePackages
You need to use “imcl listAvailablePackages” command . It will display the Offerings and packages within the Repositories.
You need to use “imcl listAvailablePackages” command . It will display the Offerings and packages within the Repositories.
|
[root@wasnode tools]# ./imcl
listAvailablePackages -repositories
/IBMSoftware/was8.5_IHS_8.5/was8.5.5/WASND
com.ibm.websphere.ND.v85_8.5.5000.20130514_1044[root@wasnode tools]# [root@wasnode tools]# ./imcl listAvailablePackages -repositories /IBMSoftware/was8.5_IHS_8.5/was8.5.5/SDK com.ibm.websphere.IBMJAVA.v70_7.0.4001.20130510_2103 com.ibm.websphere.liberty.IBMJAVA.v70_7.0.4001.20130510_2103 [root@wasnode tools]# |
=========================================================================
5) Install of Websphere ND 8.5 using imcl command line
Command: ./imcl install
To install the Product using imcl command you need to use “install” Option of imcl
a) Ensure all the prerequisites are satisfied like space , permission etc
b) Extract the WAS binaries in the server which you have downloaded
c) Execute the “imcl listAvailablePackages ” in the repository to validate the packages
|
[root@wasnode tools]# pwd
/opt/IBM/InstallationManager/eclipse/tools [root@wasnode tools]# ./imcl listAvailablePackages -repositories /IBMSoftware/was8.5_IHS_8.5/was8.5.5/WASND com.ibm.websphere.ND.v85_8.5.5000.20130514_1044 [root@wasnode tools]# |
d) Execute “imcl install” to Install
the WAS ND Packages “com.ibm.websphere.ND.v85_8.5.5000.20130514_1044″
|
[root@wasnode tools]#./imcl
install com.ibm.websphere.ND.v85_8.5.5000.20130514_1044 -repositories
/IBMSoftware/was8.5_IHS_8.5/was8.5.5/WASND -installationDirectory
/opt/IBM/WebSphere/AppServer -acceptLicense -sP25%
50%
75%
100%
——————|——————|——————|——————| …………………………………………………………………………………………… Installed com.ibm.websphere.ND.v85_8.5.5000.20130514_1044 to the /opt/IBM/WebSphere/AppServer directory. [root@wasnode tools]# |
Similarly you can install the SDK 7
Package too
|
[root@wasnode tools]# ./imcl
listAvailablePackages -repositories /IBMSoftware/was8.5_IHS_8.5/was8.5.5/SDK
com.ibm.websphere.IBMJAVA.v70_7.0.4001.20130510_2103 com.ibm.websphere.liberty.IBMJAVA.v70_7.0.4001.20130510_2103 [root@wasnode tools]#[root@wasnode tools]# ./imcl install com.ibm.websphere.IBMJAVA.v70_7.0.4001.20130510_2103 -repositories /IBMSoftware/was8.5_IHS_8.5/was8.5.5/SDK -installationDirectory /opt/IBM/WebSphere/AppServer -acceptLicense -sP25% 50% 75% 100% ——————|——————|——————|——————| …………………………………………………………………………………………… Installed com.ibm.websphere.IBMJAVA.v70_7.0.4001.20130510_2103 to the /opt/IBM/WebSphere/AppServer directory. |
e) List the Installed packages to
verify the packages you have installed
|
[root@wasnode tools]# ./imcl
listInstalledPackages
com.ibm.cic.agent_1.6.2000.20130301_2248 com.ibm.websphere.IBMJAVA.v70_7.0.4001.20130510_2103 com.ibm.websphere.ND.v85_8.5.5003.20140730_1249 |
f) List the directories where the
Websphere Packages are installed
|
[root@wasnode tools]# ./imcl listInstallationDirectories
/opt/IBM/WebSphere/AppServer [root@wasnode tools]# |
This completes the installation of
WAS ND and JAVA SDK 7
Find IBM Java version used by the WAS
Below are the few methods to find
out the Java version which is used by the Installed WAS Instance
1.From the System Out Logs
2.Using java -version
3.Using Wsadmin Script
4.Using VersionInfo.sh
1.From the System Out Logs
2.Using java -version
3.Using Wsadmin Script
4.Using VersionInfo.sh
Method 1: From the System Out Logs
a) Navigate to the Folder where the SystemOut.log is available .
Eg : /opt/IBM/WebSphere/AppServer/profiles/wp_profile/logs/WebSphere_Portal
a) Navigate to the Folder where the SystemOut.log is available .
Eg : /opt/IBM/WebSphere/AppServer/profiles/wp_profile/logs/WebSphere_Portal
b)
Open the SystemOut.log file and see the First Few lines of the Logs
Highlighted in YELLOW is the JDK
Version used by the Installed WAS instance .. ie IBM
SDK 1.6
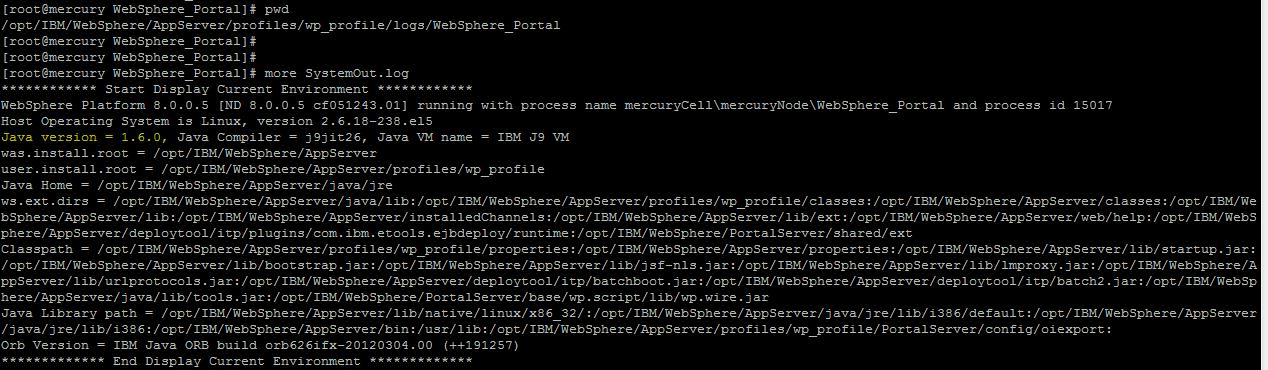
Method 2: Using java
-version
a) Navigate
to $WAS_HOME/java/bin/
ie /opt/IBM/WebSphere/AppServer/java/bin
b)
Run “java -version” from /opt/IBM/WebSphere/AppServer/java/bin
|
[root@mercury
bin]#cd /opt/IBM/WebSphere/AppServer/java/bin
|
|
[root@mercury bin]#
./java -version
|
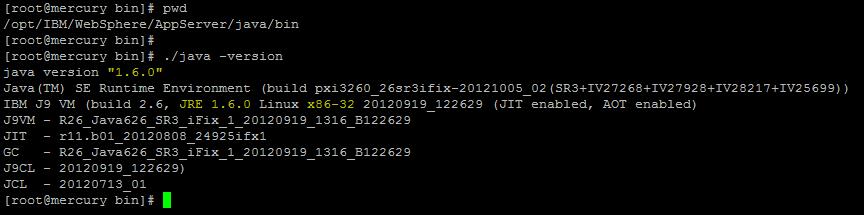
Highlighted in yellow is the
JDK version used by WAS Installation ie IBM
SDK 1.6 and its 32 bit
Method 3: Using Wsadmin Script
a)
Navigate to the $Profile/bin directory
for eg :
for eg :
|
[root@mercury
WebSphere_Portal]# cd
/opt/IBM/WebSphere/AppServer/profiles/wp_profile/bin
|
b)
Invoke wsadmin.sh with jython language type ( you can use both jacl or jython )
|
./wsadmin.sh -lang
jython
|

c)
Execute the getServerSDK for to get the SDK version of the Server
|
wsadmin>AdminTask.getServerSDK(‘[-serverName
<Server Name> -nodeName <Node Name>]’)
|
My Server Name for my environment is
: WebSphere_Portal
Node Name for my environment is : mercuryNode
Node Name for my environment is : mercuryNode
|
wsadmin>AdminTask.getServerSDK(‘[-serverName
WebSphere_Portal -nodeName mercuryNode]’)
|
Here the output is SDKNAME 1.6_32

d) Execute getAvaliableSDKsOnNode
to get the avaliabe SDKs which are installed on the specific node.
|
wsadmin>AdminTask.getAvailableSDKsOnNode(‘[-nodeName
mercuryNode]’)
|
As we have only one SDK installed on
this node its displaying the SDK
version ‘1.6_32′

Method 4: Using VersionInfo.sh
a)
Navigate to “$WAS_HOME/bin” folder and execute the ./verisonInfo.sh
Command
For eg
For eg
|
[root@mercury bin]# cd /opt/IBM/WebSphere/AppServer/bin/
|
|
[root@mercury bin]#
./versionInfo.sh
|
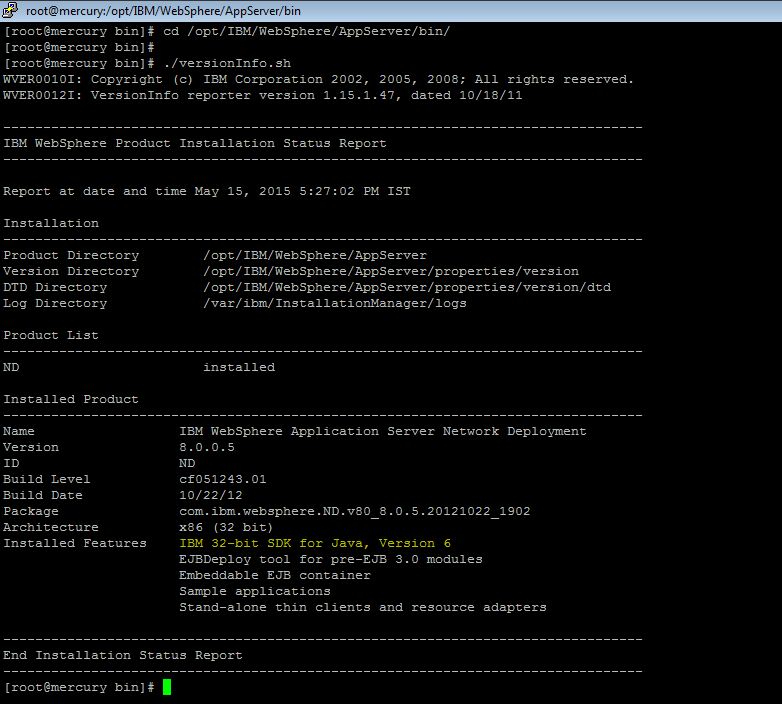
b)
Under the “Installed Features” we see the JAVA Version ie “IBM 32-bit SDK for Java, Version 6″
Websphere Application Server Fixpack Installation
using IMCL
Steps to Install a WAS FixPack
a) Check if the Fixpack which you
are going to install will be compatible with the WAS, OS , Applications which
runs on it etc
b) Download the Fixpack from the IBM Fix Central
c) Extract the Fixpack
d) Run “versionInfo.sh -long” to get the version before fixpack
b) Download the Fixpack from the IBM Fix Central
c) Extract the Fixpack
d) Run “versionInfo.sh -long” to get the version before fixpack
NOTE : TAKE THE BACKUP OF THE IIM
Installation PATH and DATA Path , TAKE THE BACKUP OF THE COMPLETE WAS
INSTALLATION DIRECTORY
|
/opt/IBM/WebSphere/AppServer/bin/versionInfo.sh
-long > ~/versionInfo_beforeFixpack.txt
|
|
[root@wasnode tools]#
/opt/IBM/WebSphere/AppServer/bin/versionInfo.sh
WVER0010I: Copyright (c) IBM Corporation 2002, 2012; All rights reserved. WVER0012I: VersionInfo reporter version 1.15.1.48, dated 2/8/12——————————————————————————– IBM WebSphere Product Installation Status Report ——————————————————————————–Report at date and time March 12, 2015 9:27:36 PM ISTInstallation ——————————————————————————– Product Directory /opt/IBM/WebSphere/AppServer Version Directory /opt/IBM/WebSphere/AppServer/properties/version DTD Directory /opt/IBM/WebSphere/AppServer/properties/version/dtd Log Directory /var/ibm/InstallationManager/logsProduct List ——————————————————————————– ND installedInstalled Product ——————————————————————————– Name IBM WebSphere Application Server Network Deployment Version 8.5.5.0 ID ND Build Level gm1319.01 Build Date 5/14/13 Package com.ibm.websphere.ND.v85_8.5.5000.20130514_1044 Architecture x86 (32 bit) Installed Features IBM 32-bit WebSphere SDK for Java WebSphere Application Server Full Profile |
e) Stop All the JAVA Processes like
dmgr , nodeagent or servers based on which server you are installing
f) For a distributed server , Apply Fixpack for the DMGR first and then the Nodes
g) Execute ./imcl listInstalledPackages to check the versions currently Installed
f) For a distributed server , Apply Fixpack for the DMGR first and then the Nodes
g) Execute ./imcl listInstalledPackages to check the versions currently Installed
|
[root@wasnode tools]# ./imcl
listInstalledPackages
com.ibm.cic.agent_1.6.2000.20130301_2248 com.ibm.websphere.IBMJAVA.v70_7.0.4001.20130510_2103 com.ibm.websphere.ND.v85_8.5.5000.20130514_1044 [root@wasnode tools]# |
h) Execute ./imcl
listInstalledPackages to check the directory where WAS currently Installed
|
[root@wasnode tools]# ./imcl
listInstallationDirectories
/opt/IBM/WebSphere/AppServer |
i) List the packages which are
available in the Fixpack extracted Directory “/IBMSoftware/was8.5_IHS_8.5/was8.5.5/FP/”
We need to update “com.ibm.websphere.ND.v85”
Package as the Product which is installed is “com.ibm.websphere.ND.v85_8.5.5000.20130514_1044”
( From the versionInfo and listInstalledPackages )
|
[root@wasnode tools]# ./imcl
listAvailablePackages -repositories /IBMSoftware/was8.5_IHS_8.5/was8.5.5/FP/
com.ibm.websphere.BASE.v85_8.5.5003.20140730_1249 com.ibm.websphere.BASETRIAL.v85_8.5.5003.20140730_1249 com.ibm.websphere.DEVELOPERS.v85_8.5.5003.20140730_1249 com.ibm.websphere.DEVELOPERSILAN.v85_8.5.5003.20140730_1249 com.ibm.websphere.EXPRESS.v85_8.5.5003.20140730_1249 com.ibm.websphere.EXPRESSTRIAL.v85_8.5.5003.20140730_1249 com.ibm.websphere.ND.v85_8.5.5003.20140730_1249 com.ibm.websphere.NDDMZ.v85_8.5.5003.20140730_1249 com.ibm.websphere.NDDMZTRIAL.v85_8.5.5003.20140730_1249 com.ibm.websphere.NDTRIAL.v85_8.5.5003.20140730_1249 |
j) Install the Fixpack by running
“imcl install”
Command: imcl install packageID[_version][,featureID]
-repositories source_repository
-installationDirectory installation_directory
-acceptLicense
-sP — Show Progress
-repositories source_repository
-installationDirectory installation_directory
-acceptLicense
-sP — Show Progress
|
[root@wasnode tools]# ./imcl
install com.ibm.websphere.ND.v85_8.5.5003.20140730_1249 -repositories
/IBMSoftware/was8.5_IHS_8.5/was8.5.5/FP -installationDirectory
/opt/IBM/WebSphere/AppServer -acceptLicense -sP
25% 50% 75% 100% ——————|——————|——————|——————| ……………………………………………………………………………………………Updated to com.ibm.websphere.ND.v85_8.5.5003.20140730_1249 in the /opt/IBM/WebSphere/AppServer directory. |
k) Verify the Installation
We will see that the Websphter.ND is v85_8.5.5003.20140730
We will see that the Websphter.ND is v85_8.5.5003.20140730
|
[root@wasnode tools]# ./imcl
listInstalledPackages
com.ibm.cic.agent_1.6.2000.20130301_2248 com.ibm.websphere.IBMJAVA.v70_7.0.4001.20130510_2103 com.ibm.websphere.ND.v85_8.5.5003.20140730_1249 |
|
[root@wasnode tools]#
/opt/IBM/WebSphere/AppServer/bin/versionInfo.sh
WVER0010I: Copyright (c) IBM Corporation 2002, 2012; All rights reserved. WVER0012I: VersionInfo reporter version 1.15.1.48, dated 2/8/12——————————————————————————– IBM WebSphere Product Installation Status Report ——————————————————————————–Report at date and time March 12, 2015 10:41:14 PM ISTInstallation ——————————————————————————– Product Directory /opt/IBM/WebSphere/AppServer Version Directory /opt/IBM/WebSphere/AppServer/properties/version DTD Directory /opt/IBM/WebSphere/AppServer/properties/version/dtd Log Directory /var/ibm/InstallationManager/logsProduct List ——————————————————————————– ND installed IBMJAVA7 installedInstalled Product ——————————————————————————– Name IBM WebSphere Application Server Network Deployment Version 8.5.5.3 ID ND Build Level cf031430.01 Build Date 7/30/14 Package com.ibm.websphere.ND.v85_8.5.5003.20140730_1249 Architecture x86 (32 bit) Installed Features IBM 32-bit WebSphere SDK for Java WebSphere Application Server Full Profile EJBDeploy tool for pre-EJB 3.0 modules Embeddable EJB container Stand-alone thin clients and resource adapters |
l) Recheck the Ownership of the
“/opt/IBM/WebSphere/AppServer” change the ownership to the owner of the WAS
Instance
|
[root@wasnode tools]# chown -R
wasadmin:wasadmin /opt/IBM/WebSphere/AppServer
|
m) Start the JVM servers and veiw
the System logs to check if there are any errors
Silent Installation of Websphere Application Server
8.5.5 on Linux
Steps as follows
1) Download the necessary packages
and the fixpacks from the Passport Advantage
2) Ensure the necessary access is available .. in our case its root ( Though we can install using a non-root user)
3) Create the necessary filesystems ( we will be installing in /apps )
4) Check for sufficient space in the filesystem to extract the zip files and the installation
2) Ensure the necessary access is available .. in our case its root ( Though we can install using a non-root user)
3) Create the necessary filesystems ( we will be installing in /apps )
4) Check for sufficient space in the filesystem to extract the zip files and the installation
Below are the files which we have
downloaded and transferred in the server
Installation Manager 1.6
agent.installer.linux.gtk.x86_1.6.0.20120831_1216.zip
agent.installer.linux.gtk.x86_1.6.0.20120831_1216.zip
WAS ND Fixpack 8.5.5.3
8.5.5-WS-WAS-FP0000003-part1.zip
8.5.5-WS-WAS-FP0000003-part2.zip
8.5.5-WS-WAS-FP0000003-part1.zip
8.5.5-WS-WAS-FP0000003-part2.zip
WASND 8.5.5 SDK
WS_SDK_JAVA_TEV7.0_1OF3_WAS_8.5.5.zip
WS_SDK_JAVA_TEV7.0_2OF3_WAS_8.5.5.zip
WS_SDK_JAVA_TEV7.0_3OF3_WAS_8.5.5.zip
WS_SDK_JAVA_TEV7.0_1OF3_WAS_8.5.5.zip
WS_SDK_JAVA_TEV7.0_2OF3_WAS_8.5.5.zip
WS_SDK_JAVA_TEV7.0_3OF3_WAS_8.5.5.zip
WASND 8.5.5
WASND_v8.5.5_1of3.zip
WASND_v8.5.5_2of3.zip
WASND_v8.5.5_3of3.zip
WASND_v8.5.5_1of3.zip
WASND_v8.5.5_2of3.zip
WASND_v8.5.5_3of3.zip
I have created few folders within /IbmSoftware/was8.5.5/
and saved the corresponding files in these folders
PATH
/IbmSoftware/was8.5.5/IM1.6
agent.installer.linux.gtk.x86_1.6.0.20120831_1216.zip
/IbmSoftware/was8.5.5/was8.5.5
WASND_v8.5.5_1of3.zip
WASND_v8.5.5_2of3.zip
WASND_v8.5.5_3of3.zip
/IbmSoftware/was8.5.5/sdk
WS_SDK_JAVA_TEV7.0_1OF3_WAS_8.5.5.zip
WS_SDK_JAVA_TEV7.0_2OF3_WAS_8.5.5.zip
WS_SDK_JAVA_TEV7.0_3OF3_WAS_8.5.5.zip
/IbmSoftware/was8.5.5/fixpack
8.5.5-WS-WAS-FP0000003-part1.zip
8.5.5-WS-WAS-FP0000003-part2.zip
For eg as below image
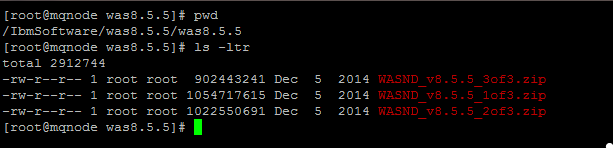
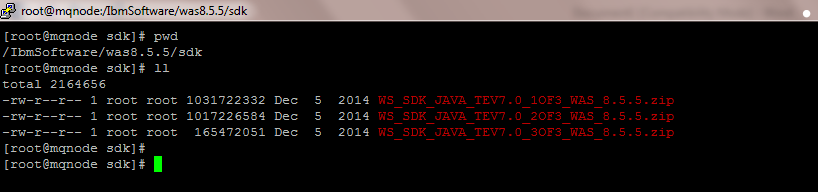
5)Installation of Installation
Manager
a) Unzip the Installation Manager
setup agent.installer.linux.gtk.x86_1.6.0.20120831_1216.zip

#unzip agent.installer.linux.gtk.x86_1.6.0.20120831_1216.zip
The extracted folder
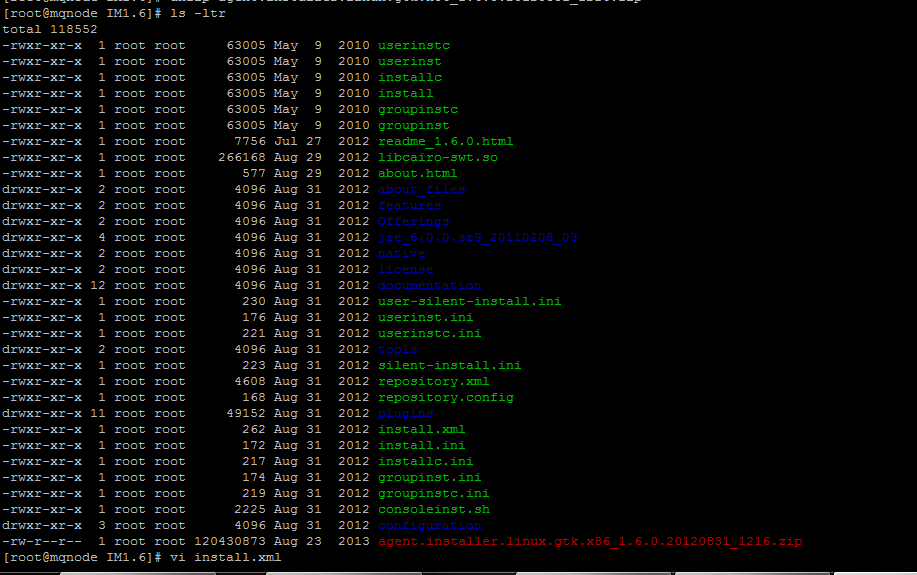
Edit install.xml to define the
location for IM installation
b) #vi install.xml
b) #vi install.xml
Add the below entries in the
install.xml file
<profile kind=’self’ installLocation=’/apps/InstallationManager/eclipse’
id=’IBM Installation Manager’>
</profile>
</profile>
Highlighted the entries in yellow
where “/apps/InstallationManager/eclipse” is the location where I need
to install the Installation Manager
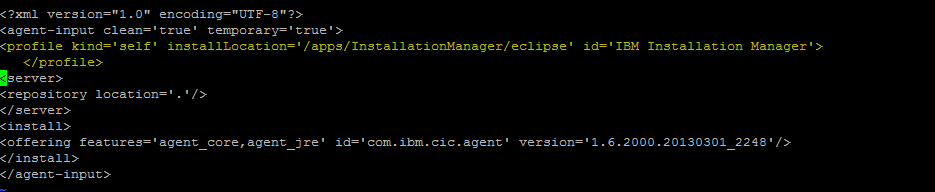
c)
Install IM1.6 silently
Execute #./installc –acceptLicense
Execute #./installc –acceptLicense
This command reads the install.xml
file and installed it in the location mentioned in it

Once the installation is completed
the message “Installed <package> to the <location> directory is
displayed
d) Verify the installation and the versions of Installation
Manager
Navigate to
/apps/InstallationManager/ folder


Execute ./imcl -version to check the version of IM fron
/apps/InstallationManager/eclipese/tools/
THIS IS HOW WE INSTALL INSTALLATION MANAGER SILENTLY
6) CREATING THE Response xml
files
a) Launching Xming to display
the graphical interface of the commands
Note : you can use any other X11 utility for unix but I prefer Xming
Note : you can use any other X11 utility for unix but I prefer Xming
============================================================================
CONFIGURING XMING
============================================================================
1) Download Xming
and install it on ur local machine from where you want to connect
2) Execute the XLaunch icon
3) Select Multiple Windows and “Next”
2) Execute the XLaunch icon
3) Select Multiple Windows and “Next”

Select “Start no Client”
Select “No Access Control”
Click on Finish
Lauch Putty
And expand the Putty Settings > Connections >> SSH >> X11
Enable “X11 Forwarding” and mention localhost:0
Now put the ip and login
And expand the Putty Settings > Connections >> SSH >> X11
Enable “X11 Forwarding” and mention localhost:0
Now put the ip and login
Once logged in enter “w” to
determine the ip you are connecting to the WAS server with .. Here its 10.0.0.2

Export the display variable using
#export=DISPLAY=10.0.0.2:0.0
#export=DISPLAY=10.0.0.2:0.0
Run xclock to check if it works

This confirms that ths X11 forwarding
works
7) Generating the response.xml
files
a) Generating the response.xml files
using the record funciton of IM
Execute #./IBMIM
–record /apps/WAS8.8.8_Install.xml –skipInstall /tmp/was8.5.5
Where
-record : ensures we are using the record function
/apps/WAS8.8.8_Install.xml : is the response file which will be created ( any file name can be used)
-skipInstall : This is to skip the installation and only create the response
/tmp/was8.5.5 : is a temp location where the Installation Manager will extract the files ( this can be any location )
/apps/WAS8.8.8_Install.xml : is the response file which will be created ( any file name can be used)
-skipInstall : This is to skip the installation and only create the response
/tmp/was8.5.5 : is a temp location where the Installation Manager will extract the files ( this can be any location )
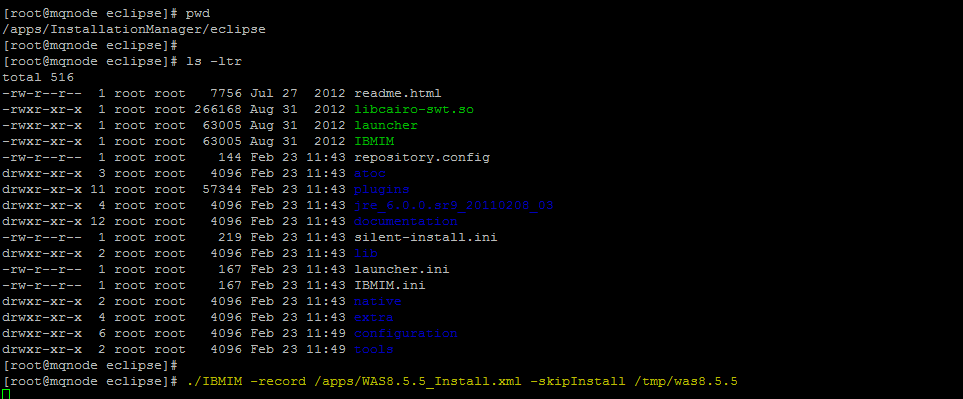
This will launch the Installation
Manager in Skip Install Recording mode (Highlighted in Yellow)

b) Add the repositories needed for
WAS 8.5.5 install
c) We will be installing the fixpack also together along with the base install
c) We will be installing the fixpack also together along with the base install
Select the repository.config for
was8.5.5
Similarly do it for the
repository.config for SDK folder and the fixpack 3
Click OK
c) Then Click Install to launch the installer function
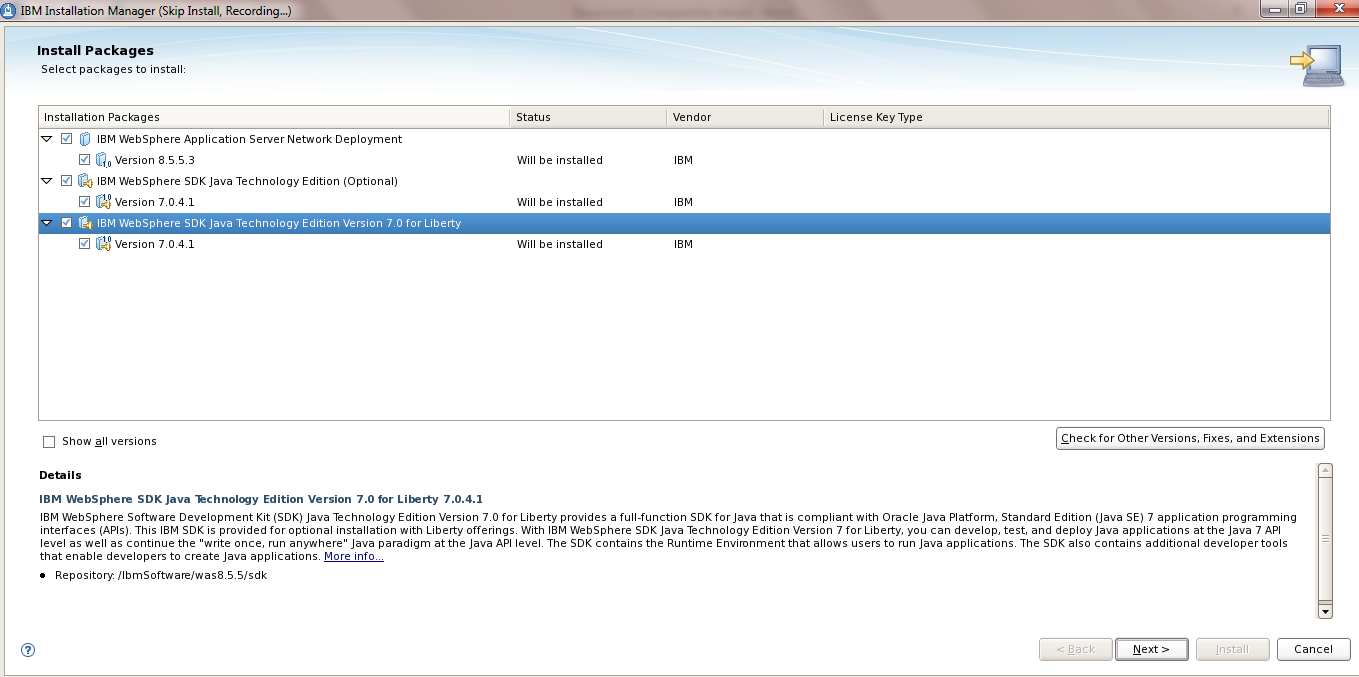
This will display the packages for
the installation ( We wil deselect the SDK for Liberty profile as its not
needed for now)
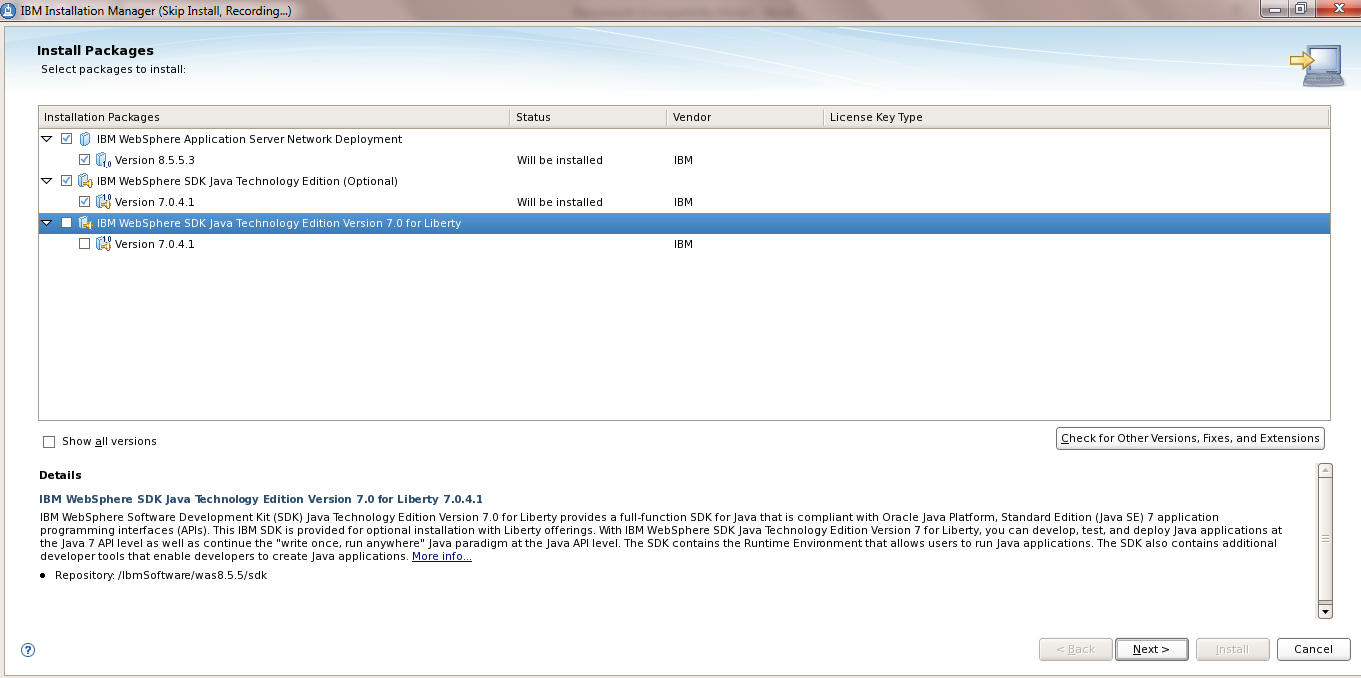
e) Accept the License
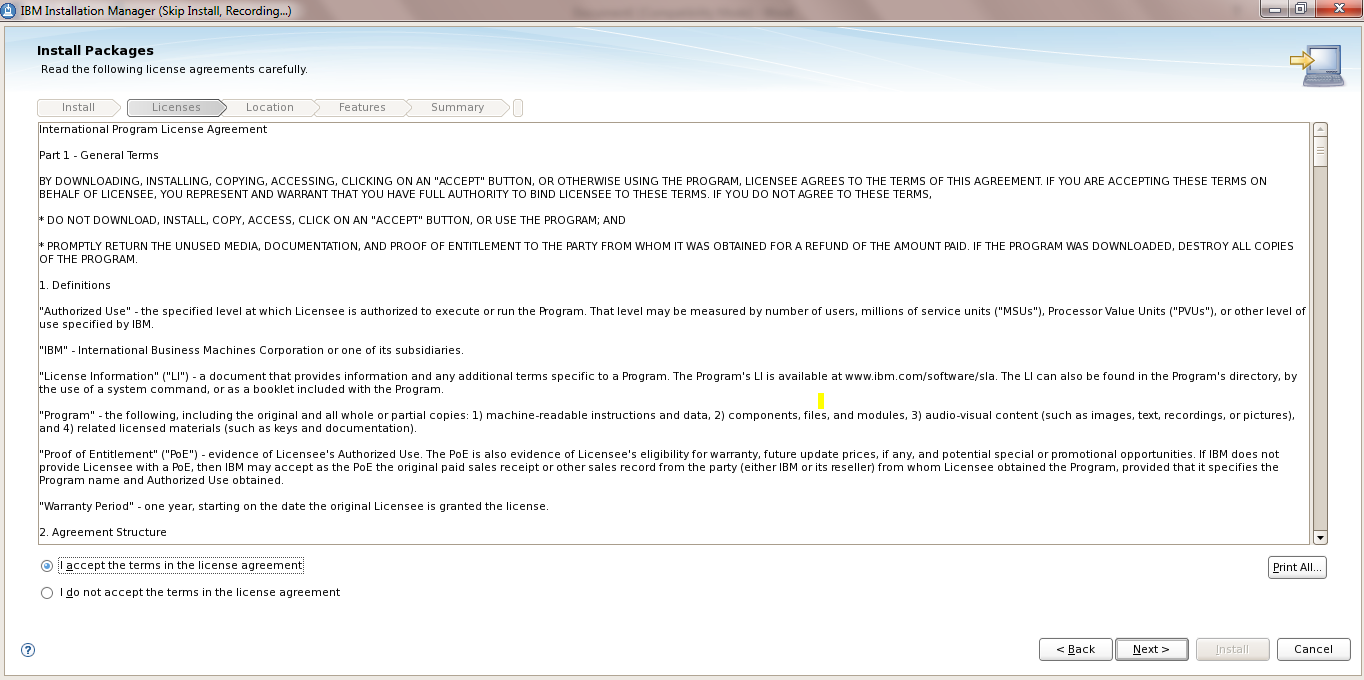
f)
Provide the path of the Shared Repository Directory ..
I gave it /apps/IMShared as I want
all the installation binaries in /apps
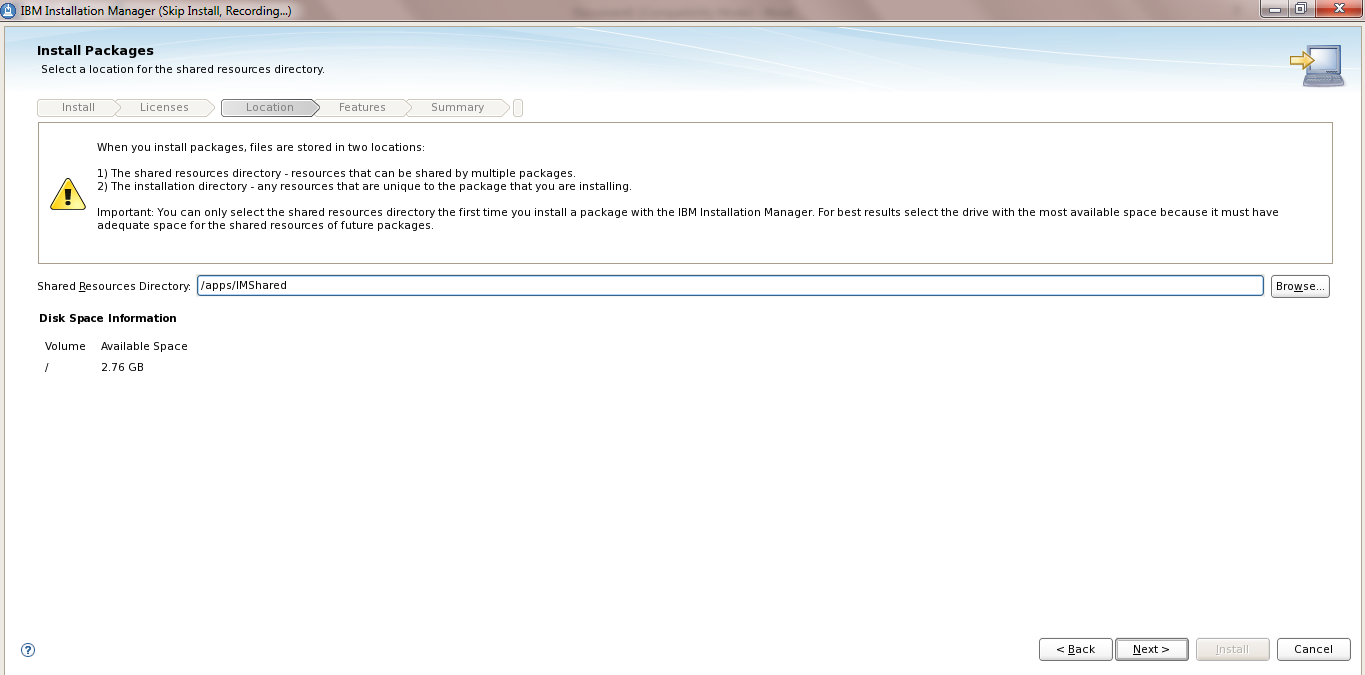
g) Provide the path where you want the WAS8.5.5.3 to be installed
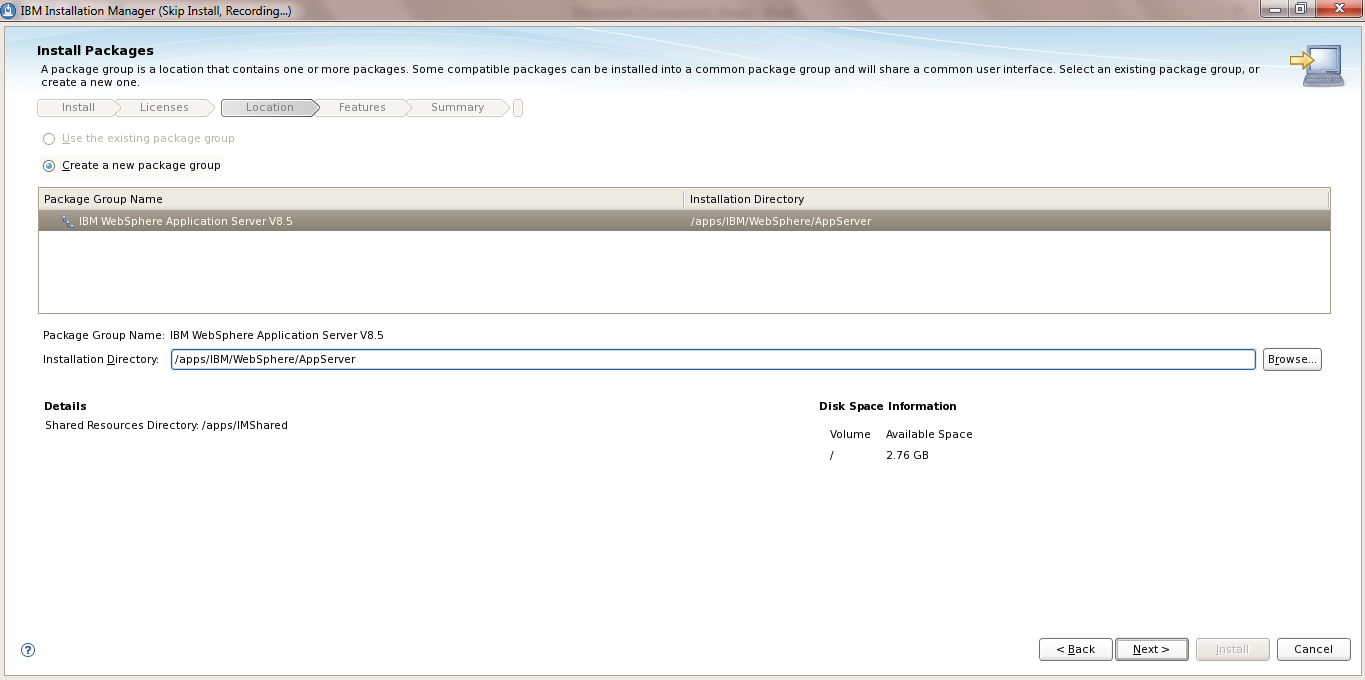
h) Select the options needed
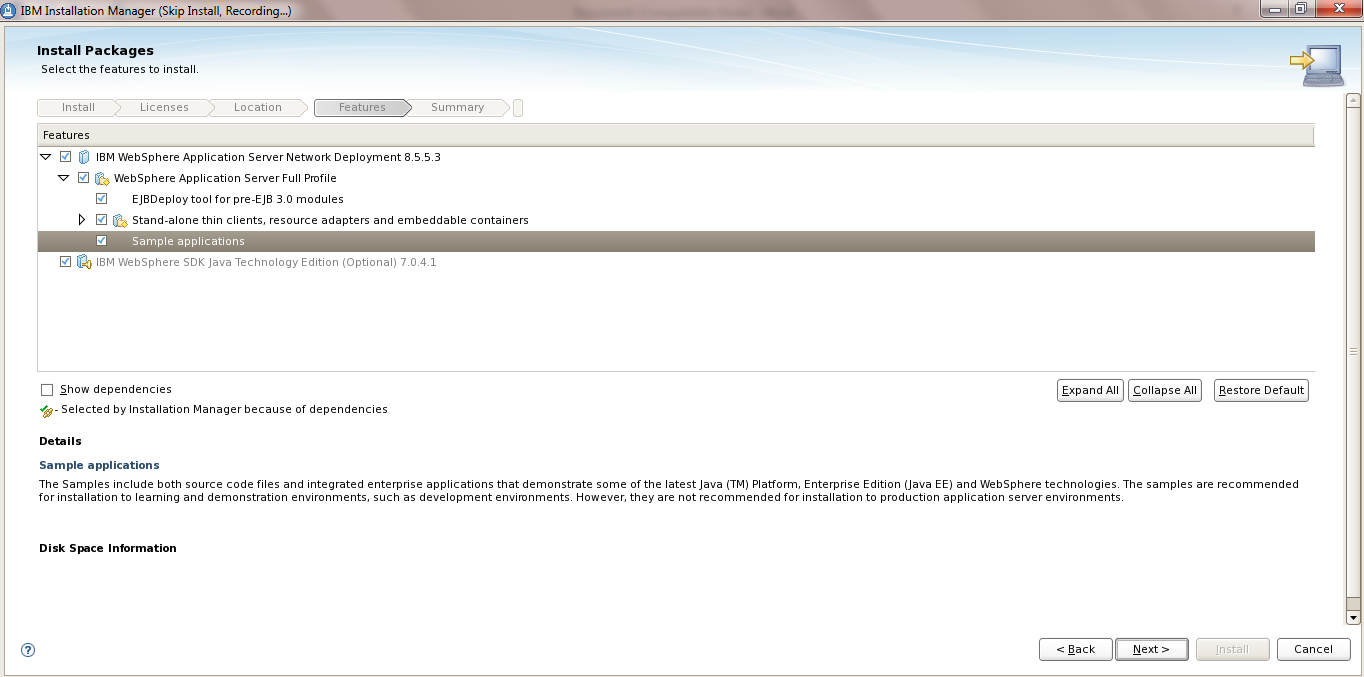
Summary screen is displayed. Click
Install
Here you can observe that the IBM WAS version is provided 8.5.5.3
IM has automatically detected the Fixpack also added in the repository
Here you can observe that the IBM WAS version is provided 8.5.5.3
IM has automatically detected the Fixpack also added in the repository
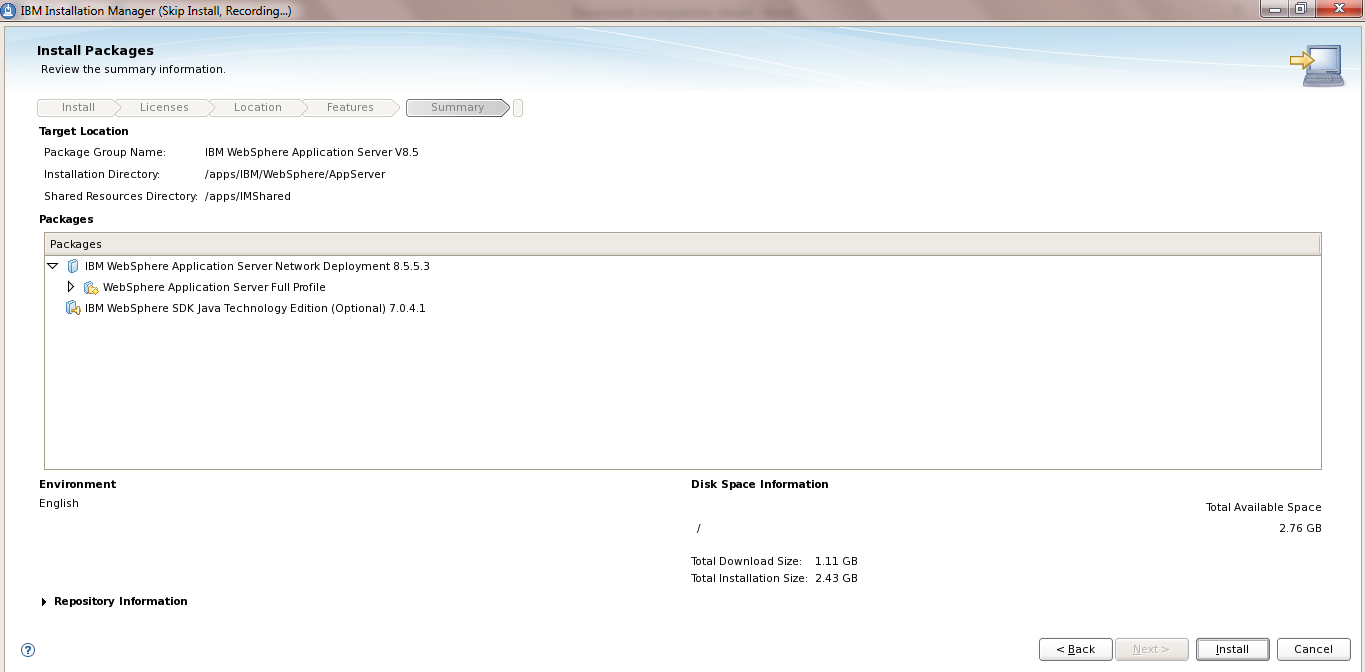
Click Finsh .
i) A file /apps/WAS8.8.8_Install.xml which is the response file for WAS8.5.5.3
Installation
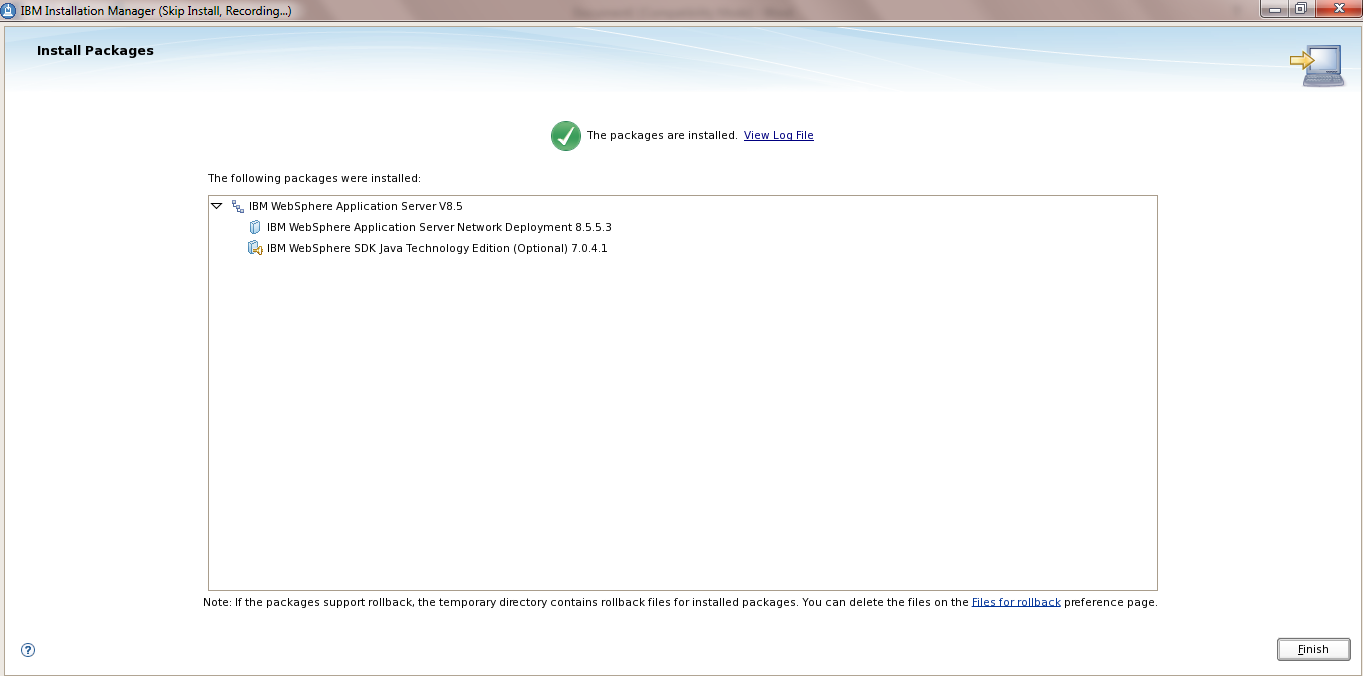
Response file

Open the file
/apps/WAS8.8.8_Install.xml
Some observation :
We can see the repository location for the packages
“/ibmSoftware…….”
Some observation :
We can see the repository location for the packages
“/ibmSoftware…….”
j) Modify the installLocation as per
your needs
Change the Profile id as required .. though not necessary unless you allready have an installation of was with the same profile id
Eg “ IBM WebSphere Application Server V8.5 MY SERVER”
Change the Profile id as required .. though not necessary unless you allready have an installation of was with the same profile id
Eg “ IBM WebSphere Application Server V8.5 MY SERVER”
Verify that the files once again for
any typo error and save it
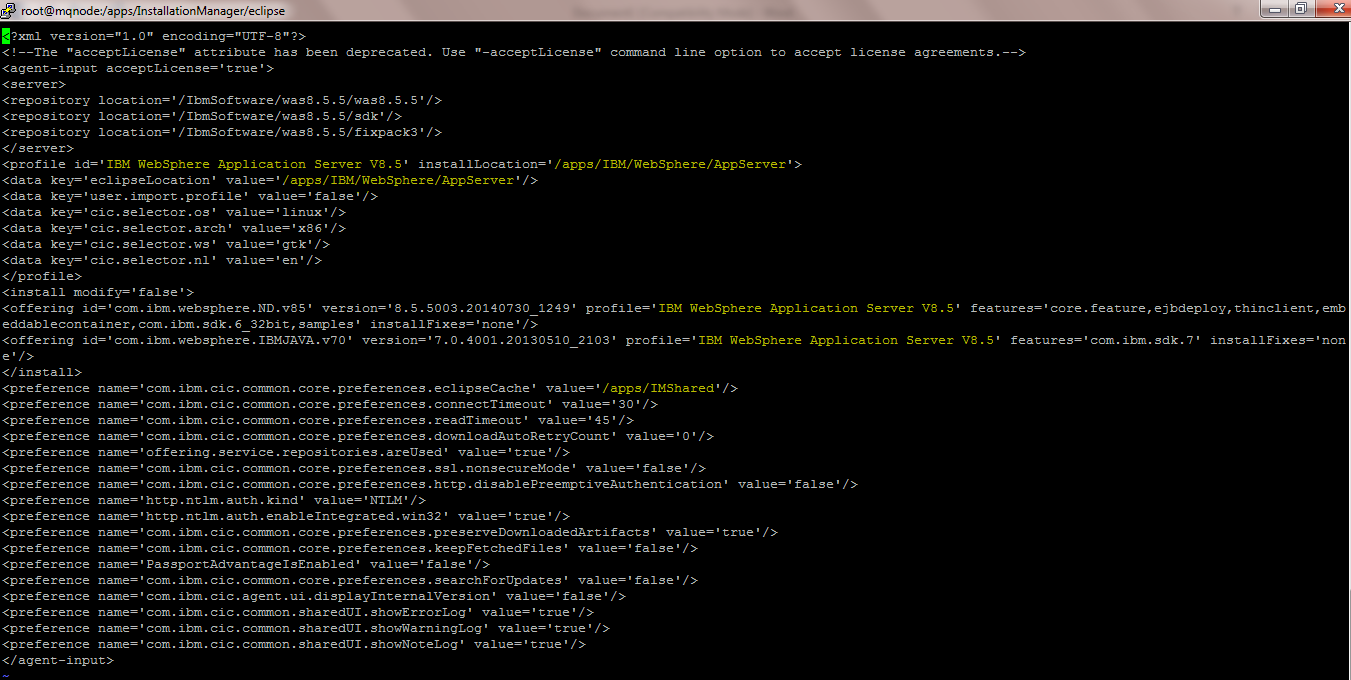
k)
Execute the imcl to install the WAS
[root@mqnode was8.5.5]# /apps/InstallationManager/eclipse/tools/imcl input /apps/WAS8.5.5_Install.xml -acceptLicense -sP

After few minutes if all is well
then it will give the output that WAS 8.5.5.3 is installed

l) Verify
the Installation

m) Check
the version using ./versionInfo.sh
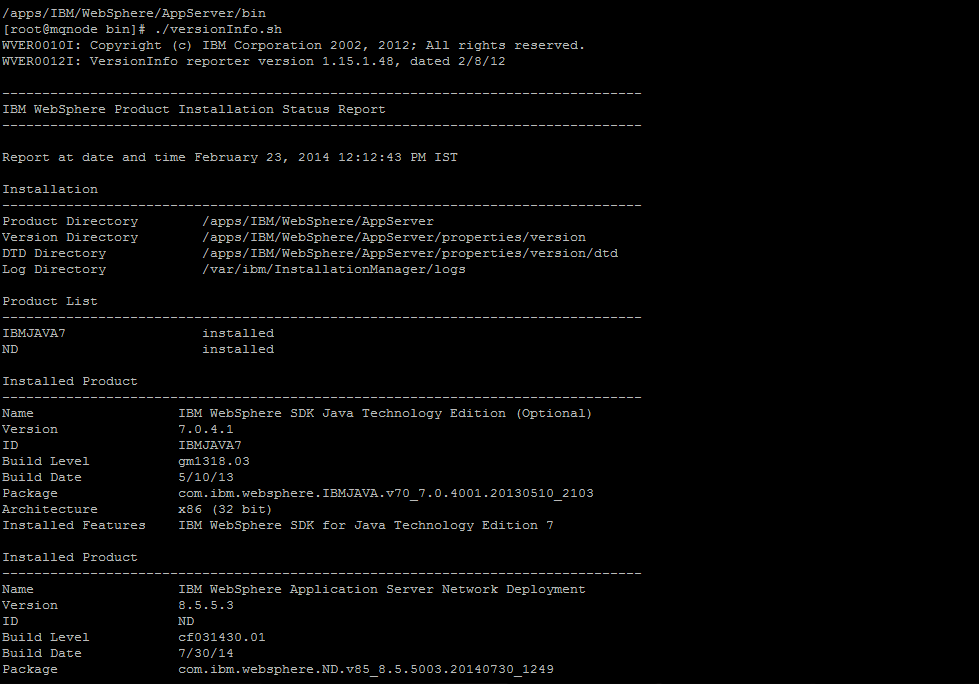
Here we can see WAS ND 8.5.5.3 is
installled at /apps/IBM location
NOTE:This response file can be used to install similar was8.5.5.3
on different machines
Also using the record function any
Installation response file can be created ie for IHS , BPM8, Websphere Portal 8
etc .
Change the Background Image of Admin Console
In this Post i will share how to
change the Background Image of the Admin console and also one you login change
the Banner
Why is it needed sometimes
a) Some customers there may be many Websphere Instances
b) Confusing between different Admin console
c) Prevent Mistake of sometimes working on a Production Admin console instead of the UAT or DEV or any other env
d) This helps to identify the environment which we intent to work with .
a) Some customers there may be many Websphere Instances
b) Confusing between different Admin console
c) Prevent Mistake of sometimes working on a Production Admin console instead of the UAT or DEV or any other env
d) This helps to identify the environment which we intent to work with .
Scope
: Change the Login Image
: Change the Banner Image post Login
: Change the Login Image
: Change the Banner Image post Login
Step1 :
The Images which are used with the Admin Console are available in the Path <WAS_ROOT>/AppServer/systemApps/isclite.ear/isclite.war/images
The Images which are used with the Admin Console are available in the Path <WAS_ROOT>/AppServer/systemApps/isclite.ear/isclite.war/images
In my case its /apps/IBM/WebSphere/AppServer/systemApps/isclite.ear/isclite.war/images
List of the png Images

For the Login Image : login_image_175x175.png
Dimensions : 175X175 px
For the Banner Image : banner-swoosh.png
Dimensions : 577X45 px
IMP: Take the Backup of these files either in the same location
as login_image_175x175.png.org & banner-swoosh.png.org or in
your local machine
Step2: Once the Backup is done , download these two images in your
local machine using Winscp from /apps/IBM/WebSphere/AppServer/systemApps/isclite.ear/isclite.war/images
Step3: Change the Login Image
We need to resize these New Images using any Image editor.. I use http://apps.pixlr.com/editor/
This is Online based, very light weight and User friendly But you can use any editor tool like MS Paint etc
We need to resize these New Images using any Image editor.. I use http://apps.pixlr.com/editor/
This is Online based, very light weight and User friendly But you can use any editor tool like MS Paint etc
NOTE :If you are going to use any
other Image Ensure that the dimensions of the new Image is same as the one your
are replacing in this case 175X175 px
I will be replacing the below Image
(Original Dimension is 175X175 px)
With the one below
 The dimensions are 175X175 px
Step4: Using Winscp move the New Image to
/apps/IBM/WebSphere/AppServer/systemApps/isclite.ear/isclite.war/images and
rename it as login_image_175x175.png
Step5: Clear the Browser Cookies and hit the admin console url .
Now you can see the new Login Image instead of the old one

Step 6: You can Also modify the Image with pixlr / MS Paint to add
the environment details
Similarly you can use any Image or
the same login_image_175x175.png with the details of your environment
details like PROD . Application server name etc
Modify the Banner Image
Step 1: Copy the banner-swoosh.png from /apps/IBM/WebSphere/AppServer/systemApps/isclite.ear/isclite.war/images to your local machine
Step 1: Copy the banner-swoosh.png from /apps/IBM/WebSphere/AppServer/systemApps/isclite.ear/isclite.war/images to your local machine
Step 2: Edit it using pixlr tool to mention the details of the
Environment

In My case i have mentioned the
“PROD MYAPP WAS-v8.5.5 ”
NOTE: You can use any image but enure the dimension of the Image is 577X45 px and can experiment with the Font , color
NOTE: You can use any image but enure the dimension of the Image is 577X45 px and can experiment with the Font , color
Save the image as banner-swoosh.png
Step 3: Upload the banner-swoosh.png to
/apps/IBM/WebSphere/AppServer/systemApps/isclite.ear/isclite.war/images
Overwrite the existing one

Step4: Clear the browser cookies and retry to login
Now we will see the details in the Banner once we login
Overwrite the existing one
Step4: Clear the browser cookies and retry to login
Now we will see the details in the Banner once we login

NOTE : You could use different
colors for each environment , for eg : Yellow — DEV , Green – UAT , RED – PROD
View jks certs in WebSphere
There is a utility “keytool” to
manage the certificates
With it you can create , view , delete, import the certs
With it you can create , view , delete, import the certs
Navigate to
[root@mqnode ~]# cd /opt/IBM/WebSphere/AppServer/java/bin/
[root@mqnode bin]# ./keytool -list -v -keystore /opt/IBM/WebSphere/AppServer/profiles/Dmgr01/etc/DummyServerTrustFile.jks
Enter keystore password:WebAS
[root@mqnode ~]# cd /opt/IBM/WebSphere/AppServer/java/bin/
[root@mqnode bin]# ./keytool -list -v -keystore /opt/IBM/WebSphere/AppServer/profiles/Dmgr01/etc/DummyServerTrustFile.jks
Enter keystore password:WebAS
The Default password for certs
in Websphere Application Server is WebAS
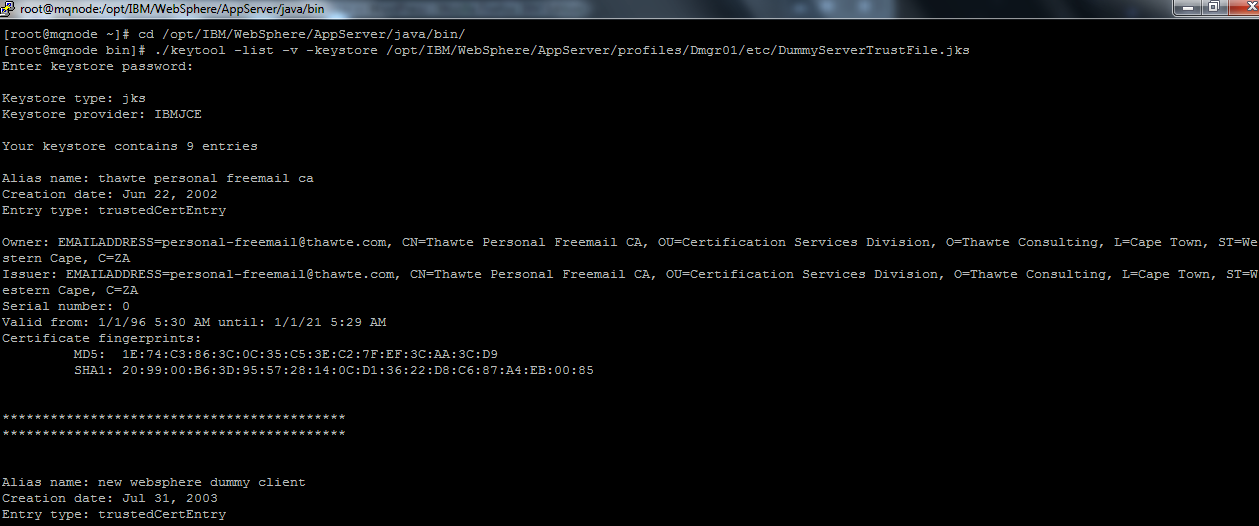
Deploy / Config Changes when the Websphere DMGR is Down
There could be instances when your Websphere Deployment Manager server
is crashed / down due any reasons .It could be due to
a) Hardware issues
b) OS issues
c) Filesystem corruption
d) Configuration Issues etc ..
Consider a scenario wherein your DMGR is down, and at the same time there is an urgent configuration change / deployment / upgrade you need to do to your application .
In this case you may need to do the changes directly to the Application server node using wsadmin commands
NOTE : This is not a recommended way
NOTE : WHENEVER THE DMGR IS UP AND RUNNING THE CHANGES WILL BE LOST DURING THE NODE SYNC Process .
NOTE :Once the DMGR is started, you would need to make the changes which you made on Application Server again to the DMGR and do a complete Sync
NOTE :For a Clustered Environment ,, the below changes needs to be one on each of the Cluster Nodes
Following are the highlevel steps to deploy the application when the DMGR is down
Step 1 : To simulate that scenario of DMGR Crashed, I have stopped the DMGR using ./stopManager.sh
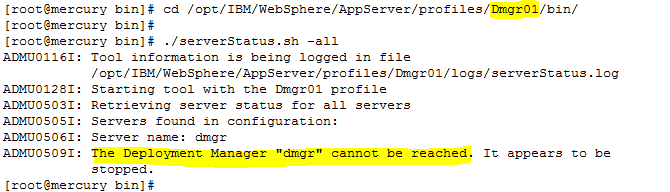
And the Application Servers is started
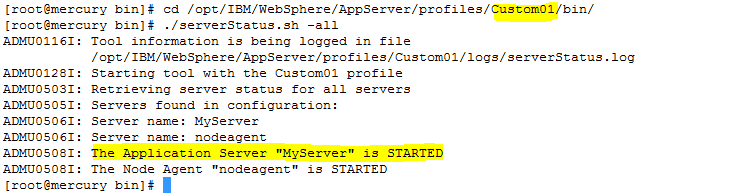
Step 2 : Login to the Application Server Node as the owner of the WAS installation .
Step 3 : Launch the wsadmin.sh from the APP_SRV_PROFILE/bin
|
[root@mercury bin]# cd
/opt/IBM/WebSphere/AppServer/profiles/Custom01/bin
|
|
[root@mercury bin]# ./wsadmin.sh
|

We will get an Error
“WASX7023E: Error creating “SOAP” connection to host “mercury.com”; exception information: com.ibm.websphere.management.exception.ConnectorNotAvailableException: [SOAPException: faultCode=SOAP-ENV:Protocol; msg=; targetException=java.net.MalformedURLException]”
The reason being that the wsadmin.properties file in the /opt/IBM/WebSphere/AppServer/profiles/Custom01/properties folder still refers to the DMGR hostname and DMGR Soap Port
We need to modify the values of the com.ibm.ws.scripting.port and com.ibm.ws.scripting.host values to match the hostname of Application Server Node
Step 4 : Modify the wsadmin.properties file
|
[root@mercury bin]#
cd /opt/IBM/WebSphere/AppServer/profiles/Custom01/properties
|
|
[root@mercury properties]# vi wsadmin.properties
|
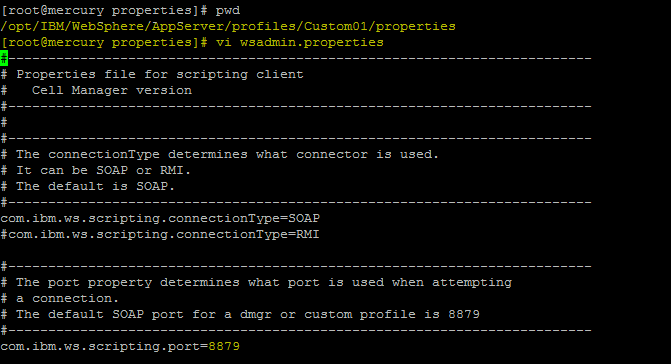
Currently the port 8879 is the SOAP port of the DMGR ..
Change the com.ibm.ws.scripting.port and com.ibm.ws.scripting.host values to the values of the Application Server Node
Here 8884 is the Soap Port of My application Server “MyServer”
Save the Changes in the wsadmin.properties file
Step 5 : Now execute the wsadmin.sh from the Application Server Node
|
[root@mercury properties]# cd
/opt/IBM/WebSphere/AppServer/profiles/Custom01/bin/
|
|
[root@mercury properties]# ./wsadmin.sh -lang jython
-conntype NONE
|

Step 6 : Deploy the application using wsadmin
In the wsadmin Prompt execute the below command . The DefaultApplication.ear is located in /opt/IBM/WebSphere/AppServer/installableApps/
NOTE : You can use wsadmin interactive Steps to deploy the application too
|
wsadmin>AdminApp.install(‘/opt/IBM/WebSphere/AppServer/installableApps/DefaultApplication.ear’,
‘[-server MyServer]’)
|
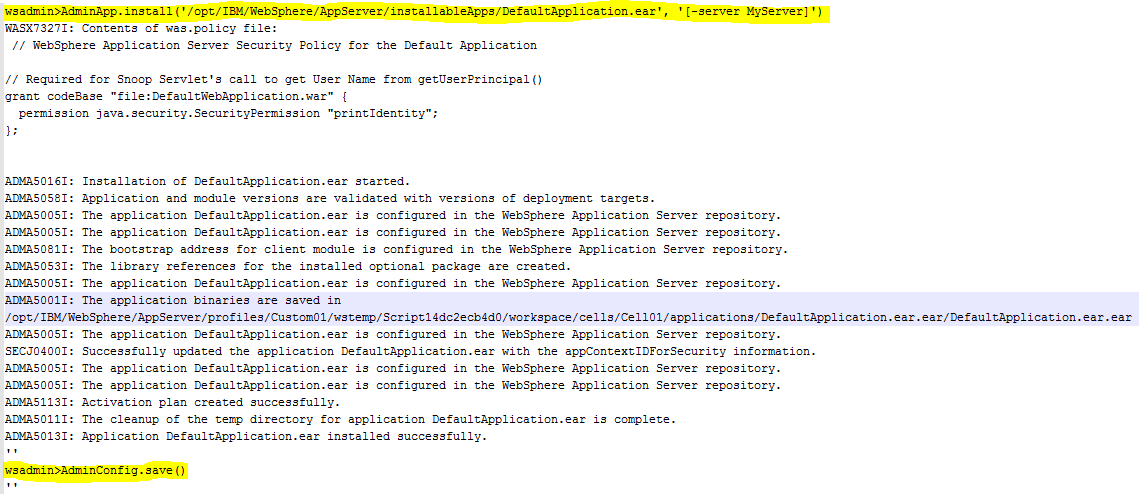
Save the configurations using AdminConfig.save
|
wsadmin>AdminConfig.save()
|
NOTE : These changes will get lost when the dmgr is started
Step 7 : Ensure the wc_default and wc_default_secure port of Application Server is available in the virtualhost.xml .
On the Application Server Node
|
[root@mercury properties]# cd
/opt/IBM/WebSphere/AppServer/profiles/Custom01/config/cell/Cell01
|
|
[root@mercury properties]# cat virtualhost.xml | grep 9082
|
|
[root@mercury properties]# cat virtualhost.xml | grep 9445
|
NOTE : If the wc_default and wc_default_secure port of your Application Server is not present in the virtualhost.xml you will get the error
“A WebGroup/Virtual Host to handle /snoop has not been defined
SRVE0255E: A WebGroup/Virtual Host to handle localhost:80 has not been defined.”
Step 8 : Start the applications using wsadmin or Restart the application server .. depending on the changes which you have done
|
[root@mercury properties]# cd
/opt/IBM/WebSphere/AppServer/profiles/Custom01/bin
|
|
[root@mercury bin]# ./stopServer.sh MyServer
|
|
[root@mercury bin]# ./startServer.sh MyServer
|
Step 9 : Validate if the application has been deployed only to the application node and not the DMGR .
Validation 1 : Check the Application Server SystemOut.log after the Application server / Application is started.
Check the systemOut.log to see if the Application DefaultApplication has started properly .
Also check if the web containers are mapped to the proper ports ..
Refer the screenshot of SystemOut.log

Validation 2 : Check the serverindex.xml of both Application Server Node and Dmgr Node
Application Node
|
[root@mercury mercuryNode01]# cat
/opt/IBM/WebSphere/AppServer/profiles/Custom01/config/cells/Cell01/nodes/mercuryNode01/serverindex.xml
|

Here we can see the Application which we deployed ie DefaultApplication.ear.ear in the serverindex.xml
Dmgr Node
|
[root@mercury mercuryNode01]# cat
/opt/IBM/WebSphere/AppServer/profiles/Dmgr01/config/cells/Cell01/nodes/mercuryNode01/serverindex.xml
|

Similarly in the Dmgr Node’s Serverindex.xml we can not see the deployed application :DefaultApplication.ear.ear
Validation 3 : Check the <Profile_Home>/config/cells/Cell01/applications folder for the deployed application
Application Server Node
|
[root@mercury mercuryNode01]# ls -l
/opt/IBM/WebSphere/AppServer/profiles/Custom01/config/cells/Cell01/applications
|
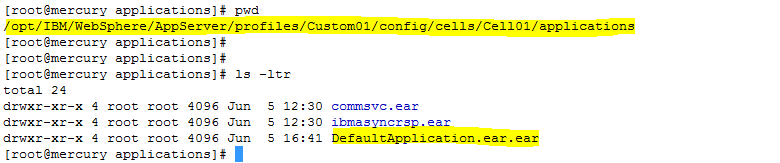
We can see the DefaultApplication.ear.ear in this folder
Dmgr Node
|
[root@mercury mercuryNode01]# ls -l
/opt/IBM/WebSphere/AppServer/profiles/Dmgr01/config/cells/Cell01/applications
|

There is no DefaultApplication.ear.ear
Step 10 : Check the deployed application using the browser
url : http://IP of the Application Server:wc_default/snoop
As I have deployed the DefaultApplication I will be testing if the application snoop is accessible now on the applicaiton server when the DMGR is down
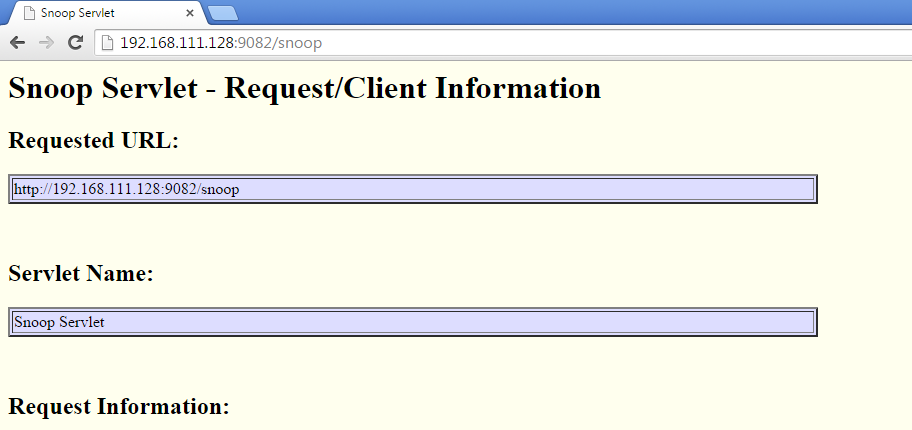
This shows we can deploy the application directly on the Application Server Node when the DMGR is down
NOTE : As mentioned above these changes will get overwritten when the Node sync happens when the DMGR is started
NOTE :Once the DMGR is started, you would need to make the changes which you made on Application Server again to the DMGR and do a complete Sync
Really good work. Helped me Lot. I appreciate your work and your collection of q&a. Thank you
ReplyDeleteThanks, Very much helpful...
ReplyDelete